This is a crochet bracelet made using chain stitches only.
It’s perfect for beginners who already know how to make a chain stitch and want to create a small, wearable project.
This tutorial is divided into three videos, each covering one part of the bracelet, so you can follow along step by step.
If you’re brand new to crochet or still getting comfortable with chain stitches, I recommend starting with the Start Here beginner guide before this project.
Tools You’ll Need
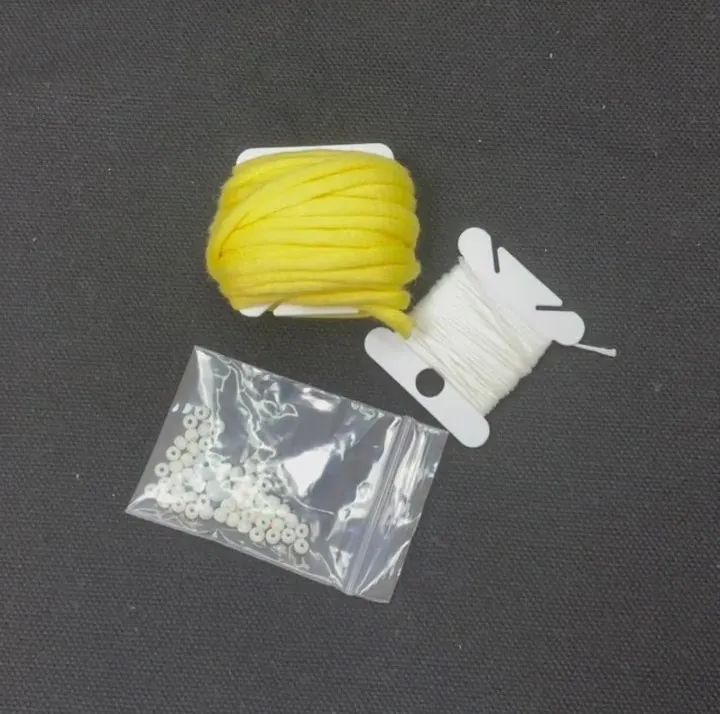
Yarn
You can use any yarn that’s easy for you to work with.
If you’re making a men’s bracelet, you may prefer a slightly thicker yarn.
For a women’s bracelet, a thinner yarn works well.
In this tutorial, I’m using a thin, lightweight yarn that pairs nicely with a small hook.
Crochet Hook
I’m using a 2.0 mm crochet hook.
If you don’t have this size, that’s okay — just choose a hook that matches your yarn comfortably.
Stitch Marker (optional but helpful)
A stitch marker can help you keep track of your stitches, which is especially useful for beginners.
You don’t need any special tools for this project. If you’re still unsure how to choose the right hook for your yarn, this guide on choosing a crochet hook may help.
As long as your yarn and hook work well together, you’re good to go.
Other Materials (for Decoration & Finishing)
You’ll also need a few decorative beads for the bracelet design.
For the adjustable closure at the ends of the bracelet, you’ll need a piece of lace thread.
This is the part where you pull both sides to tighten and secure the bracelet in the center.
You’ll also need a piece of very thin, flexible wire to help thread the beads.
How This Tutorial Works
This bracelet tutorial is divided into three steps, with three matching videos.
I recommend watching each video once from start to finish before you begin, then crocheting along at your own pace.
The written steps and photos below are meant to go along with the videos, serving as visual and written prompts to help you follow each part more easily.
Step 1: Bracelet Body (Video 1)
In this step, you’ll crochet the main body of the bracelet using chain stitches only. If you want to practice chain stitches on their own, you can also check out Chain Stitch for Absolute Beginners.
As you work, measure your wrist and adjust the number of chains to get the right length.
Make sure to leave some space at the correct position for the adjustable section that will be added later.
Once the bracelet body is complete, place a stitch marker in the last stitch to mark the end.
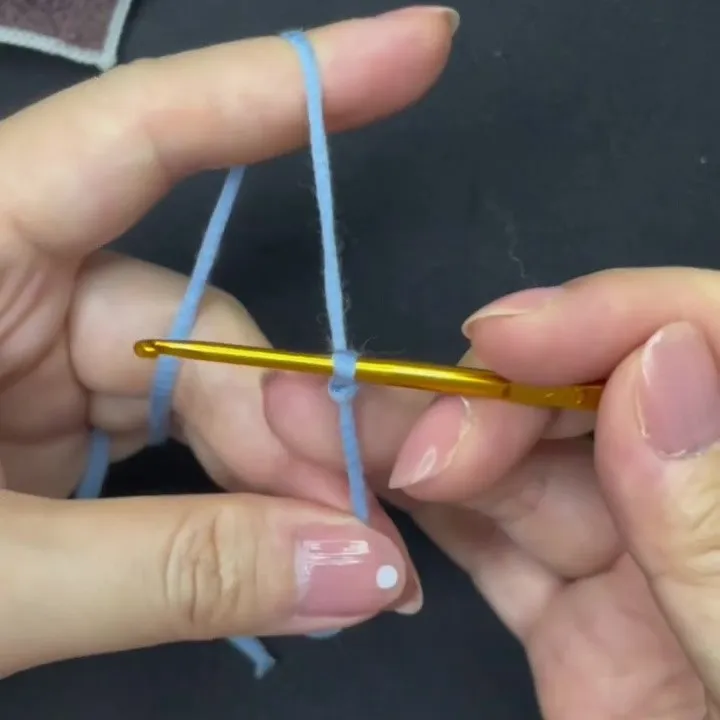
Chain 40 stitches for the first row.
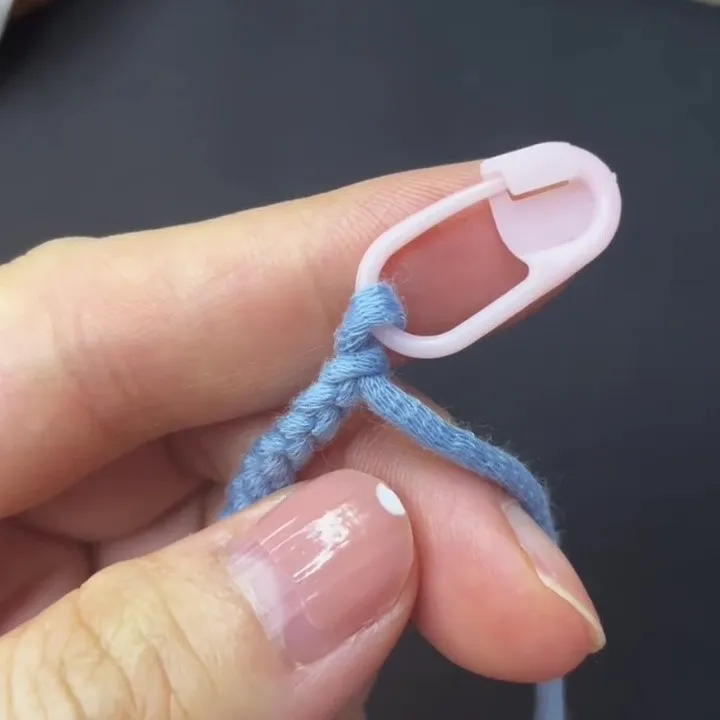
Place a stitch marker in the last stitch.
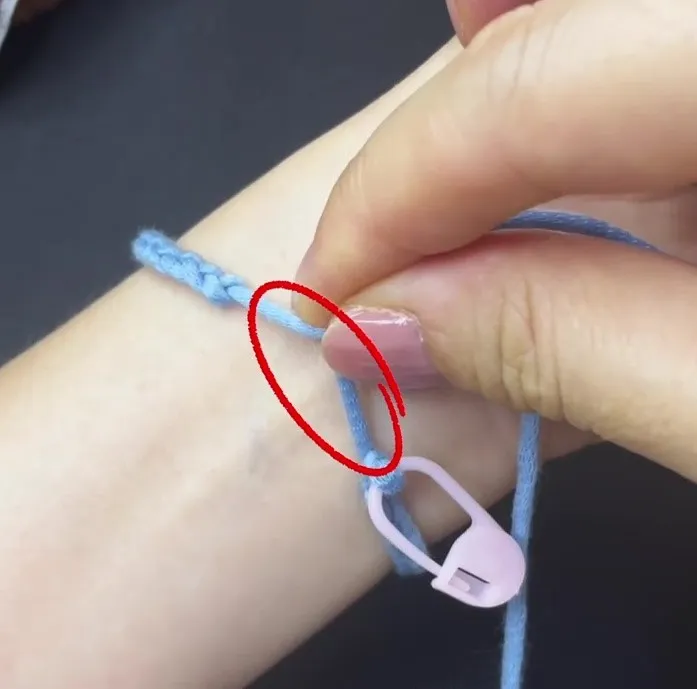
Measure your wrist length.
If it’s too short, add a few more chain stitches.
Leave about 3 cm of space at the marked area.
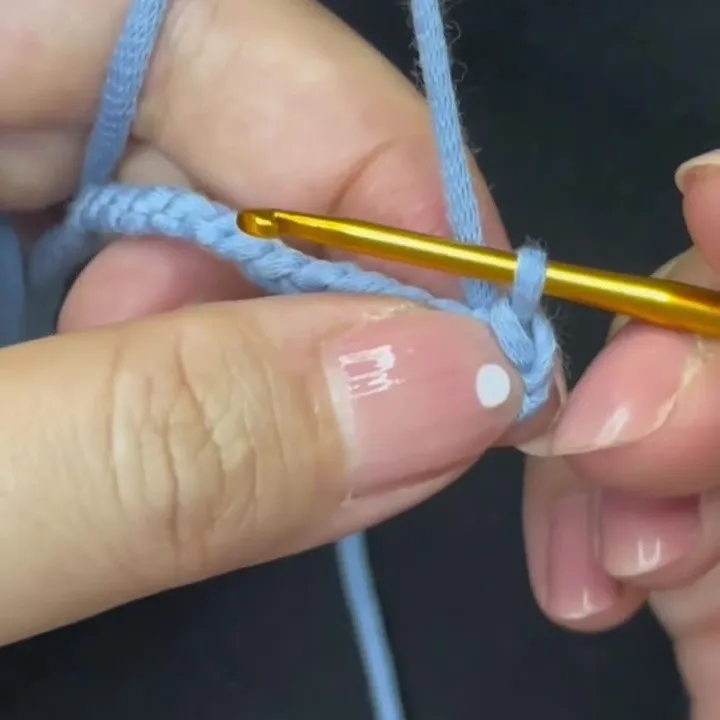
Work a slip stitch into the second-to-last stitch.
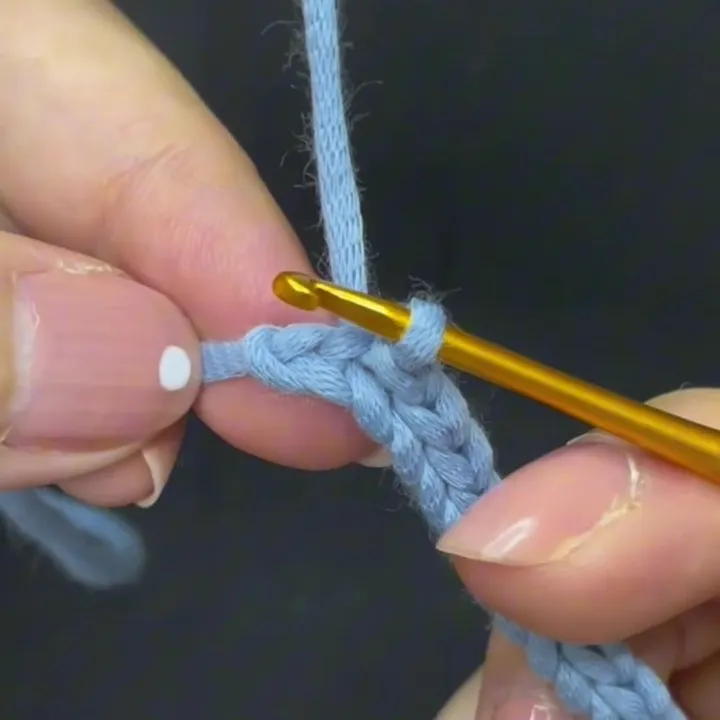
For the second row, work slip stitches all the way to the last stitch.
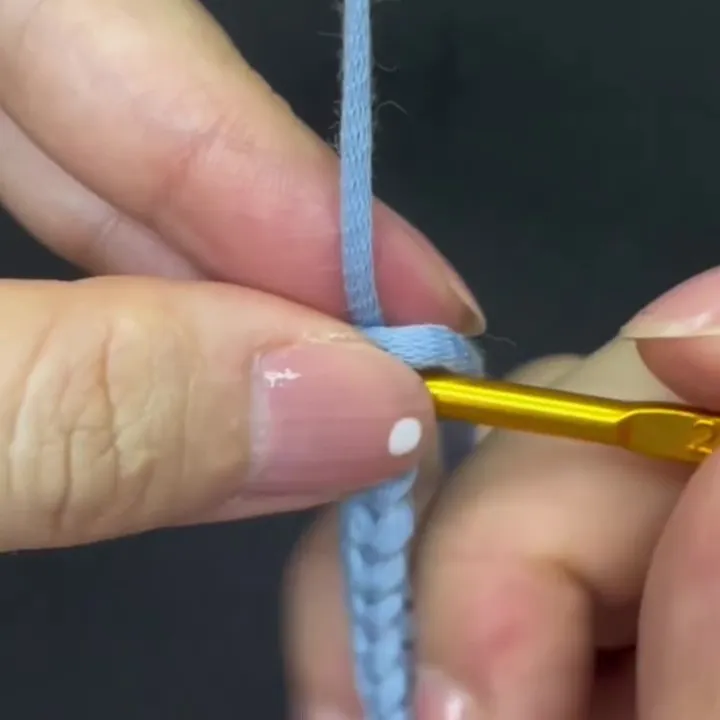
Bring the yarn tail over the hook.
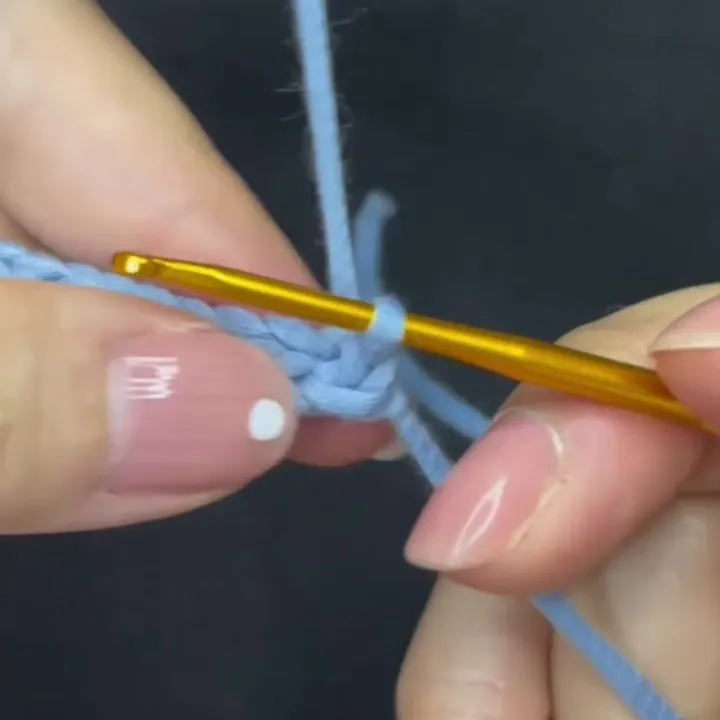
Continue working slip stitches around the foundation chain until you reach the last stitch.
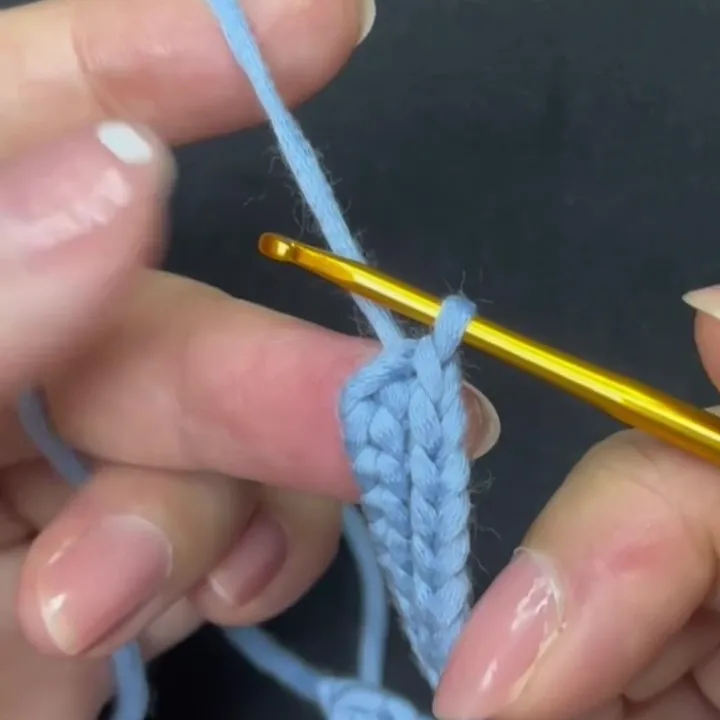
Chain 1 to finish, pull up the loop and cut the yarn.
Leave a 15–20 cm tail.
Step 2: Beaded Section (Video 2)
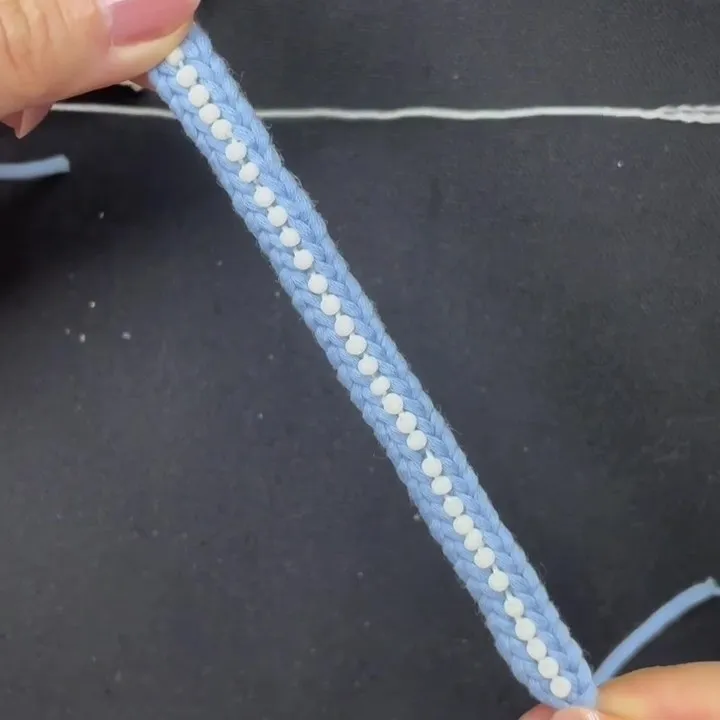
In this step, you’ll learn how to add decorative beads to the bracelet while crocheting.
The beads are worked directly into the bracelet using chain stitches, so they become part of the design rather than separate decorations.
Take your time with this section and follow the video closely, especially when positioning each bead.
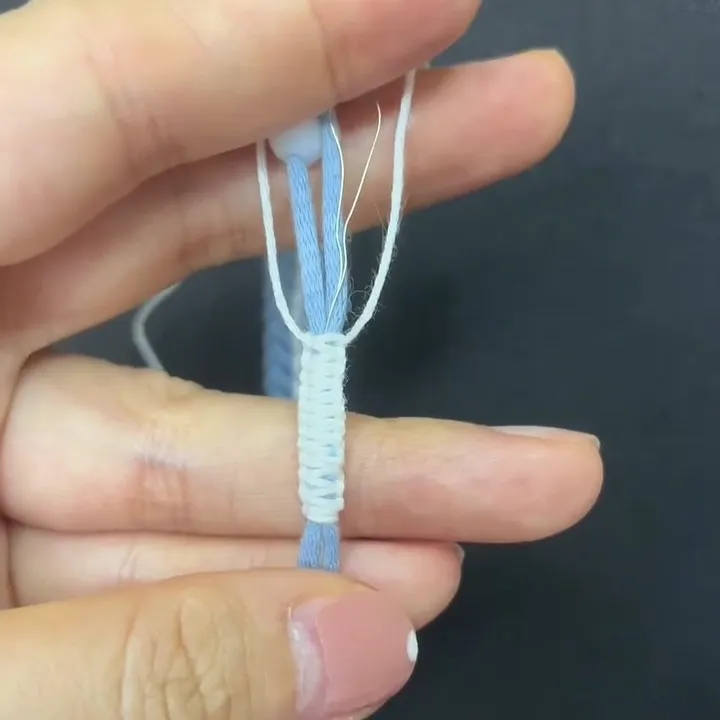
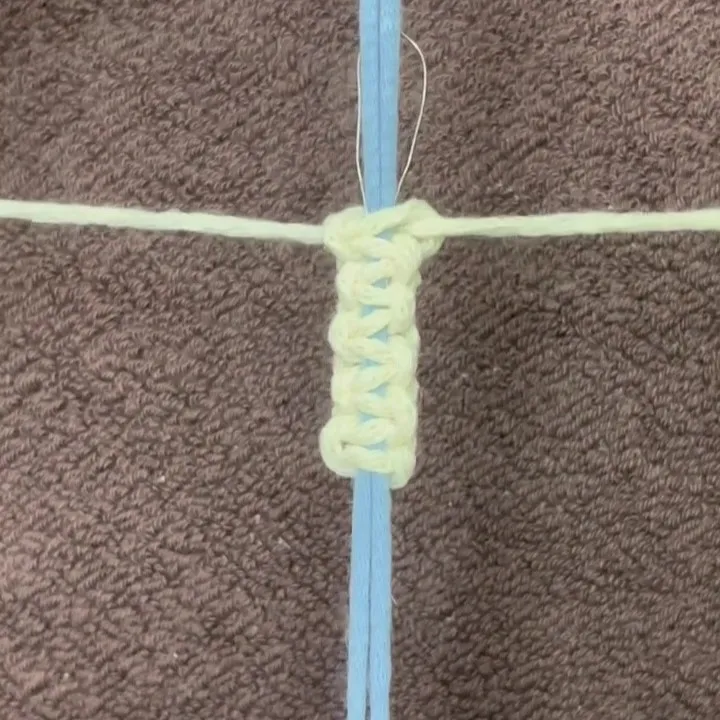
Step 3: Sliding Knot (Video 3)
In this step, you’ll make the sliding knot that creates an adjustable closure for the bracelet.
This part allows the bracelet to be tightened or loosened by pulling the ends, so it fits comfortably on the wrist.
Follow the video carefully to see how the knot is formed and secured at the end.
Common Beginner Tips
If the bracelet length doesn’t feel right
Always try the bracelet on before finishing.
If it feels too short, add a few more chain stitches. If it’s too long, undo a few chains and adjust before moving on.
Why leaving a long yarn tail matters
Leaving enough yarn at the end makes it much easier to finish the bracelet neatly, especially when working the sliding knot. Short tails can make the final steps frustrating.
Why your slip stitches may look uneven
Uneven slip stitches are very common for beginners. This usually happens when stitch tension changes or when stitches are skipped accidentally. Slow down, check each stitch, and keep your tension relaxed and consistent.
What to Try Next
Once you’ve finished this bracelet, you can keep practicing in a few simple ways:
- Try making the bracelet in a different length or color using the same chain-only method
- Add more beads or decorations to create your own variations
- Keep practicing chain stitches by starting another small, beginner-friendly project
If you’d like to try a slightly larger project next, you might enjoy the Mini Crochet Scarf for Beginners.
Small projects like these are a great way to get comfortable with your hands and your yarn — and every finished piece makes the next one feel easier.