This mini crochet turtle is the kind of tiny project I like making when I want something cute, quick, and not too serious. It has a simple round shell, a small stuffed body, and little unstuffed legs and tail that come together at the end.
I especially like how the turtle does not look like much at first, but once the head, legs, and tail are attached, it suddenly becomes very sweet. If you are still practicing small beginner-friendly crochet projects, this is a nice one to try.
You can watch the video first to see how the pieces fit together, then use the written pattern below as your step-by-step guide.
Watch the Mini Turtle Video First
This tiny turtle is easier to understand when you see the pieces come together first. In the video, I show the shell, belly, head, legs, tail, stuffing step, and final assembly with glue.
Once you have watched the process, the written pattern below can work as a simple round-by-round checklist while you crochet.
Mini Crochet Turtle Pattern
Materials
- Green yarn for the shell, head, legs, and tail
- A lighter color yarn for the belly
- A crochet hook that matches your yarn
- Fiberfill stuffing
- Stitch marker
- Yarn needle
- Scissors
This pattern uses US crochet terms. Work in continuous rounds unless stated otherwise, and use a stitch marker to mark the first stitch of each round.
For my mini turtle, I used a small cotton yarn and a 2.0 mm crochet hook. You do not have to use the exact same yarn, but try to choose a hook that keeps your stitches firm enough so the stuffing does not show through. If you are still figuring out hook sizes, my crochet hooks for beginners guide may help.
For tiny amigurumi like this, I usually prefer yarn that is not too fluffy, because clear stitches make the small parts easier to shape. If you are not sure what type of yarn to start with, you can also read my best yarn for crochet beginners guide.
Abbreviations
- MR = magic ring
- sc = single crochet
- inc = increase, 2 sc in the same stitch
- dec = decrease, single crochet 2 stitches together
- st / sts = stitch / stitches
- R = round
If the magic ring still feels new to you, you may want to review my single crochet magic ring guide before starting the shell. This turtle uses a magic ring several times, so it is worth getting comfortable with that first step.
In the original chart:
- x = sc
- v = inc
- a = dec
Turtle Shell
Use green yarn.
R1: 6 sc in MR. (6)
R2: inc in each st around. (12)
R3: (sc, inc) repeat 6 times. (18)
R4: (sc, inc, sc) repeat 6 times. (24)
R5: (3 sc, inc) repeat 6 times. (30)
R6–R8: sc in each st around. (30)
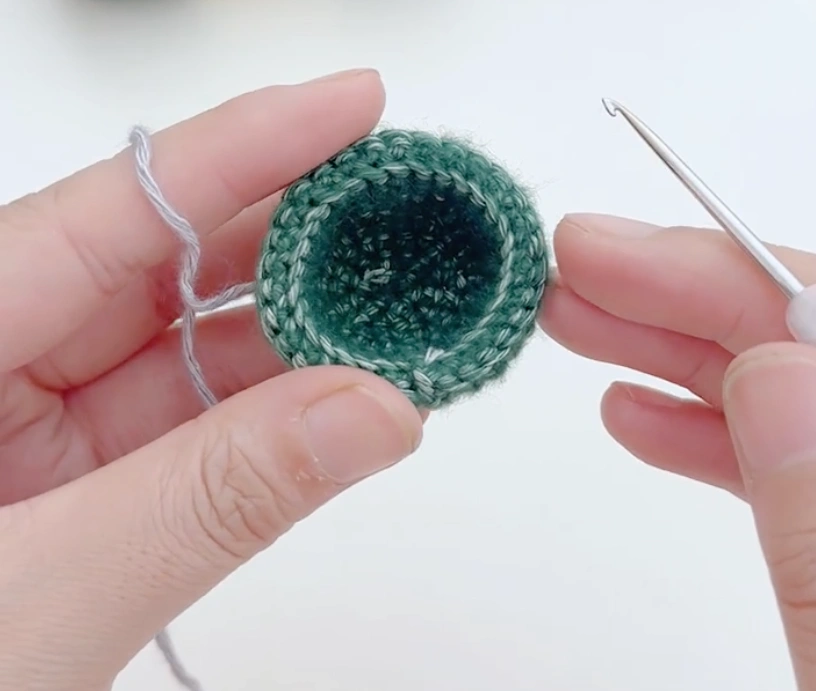
For the next 2 rounds, work into the outer loops only to create the shell edge.
R9–R10: sc in each st around, working into the outer loops only. (30)
Fasten off and weave in the yarn end.
Do not worry if you see unused loops inside the shell after R8. You will use those inside loops later to start the belly.
Turtle Belly
Use the belly color yarn.
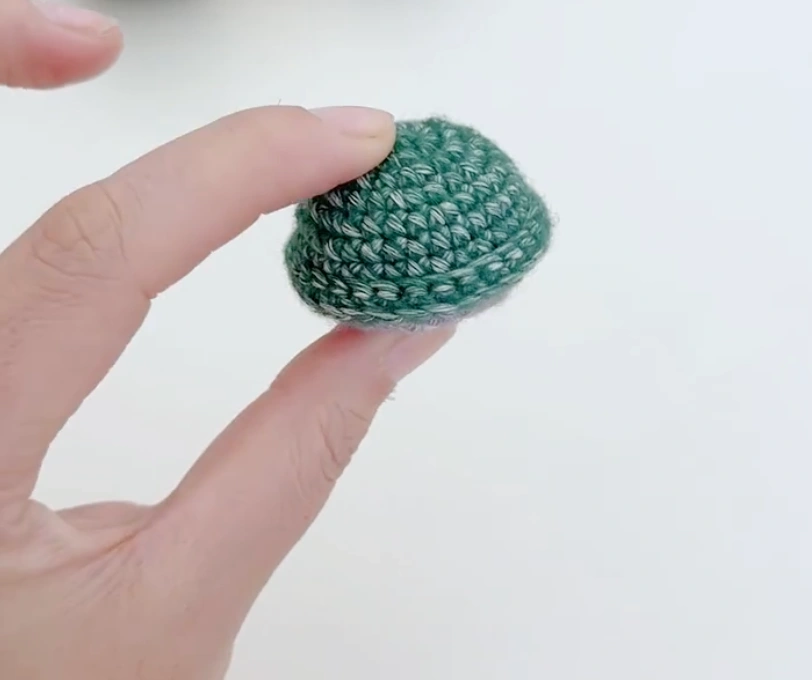
The belly is worked into the unused inside loops from R8 of the shell. This means you do not need to crochet a separate belly piece and sew it on later.
Join the belly yarn to one of the unused inside loops from shell R8.
R1: sc in each unused inside loop around. (30)
R2: (3 sc, dec) repeat 6 times. (24)
R3: (sc, dec, sc) repeat 6 times. (18)
Start stuffing the turtle body through the belly opening. Add the stuffing little by little so the shell keeps a soft, rounded shape.
R4: (sc, dec) repeat 6 times. (12)
Add a little more stuffing if needed before the opening becomes too small. The turtle body should feel full, but not so tight that the stitches stretch open.
R5: (dec) repeat 6 times. (6)
Fasten off, leaving a yarn tail. Weave the tail through the remaining front loops, pull tight to close, and hide the yarn end inside the body.
Turtle Head
Use green yarn.
R1: 6 sc in MR. (6)
R2: inc in each st around. (12)
R3: (sc, inc) repeat 6 times. (18)
R4–R6: sc in each st around. (18)
Add a small amount of stuffing to the head.
R7: (dec) repeat 9 times. (9)
Fasten off and weave in the yarn end. If you prefer sewing the head on instead of gluing it, you can leave a longer tail.
You can leave the opening slightly flat instead of closing it completely. This makes the head sit more neatly against the front of the turtle body, whether you glue it or sew it on.
Turtle Legs and Tail
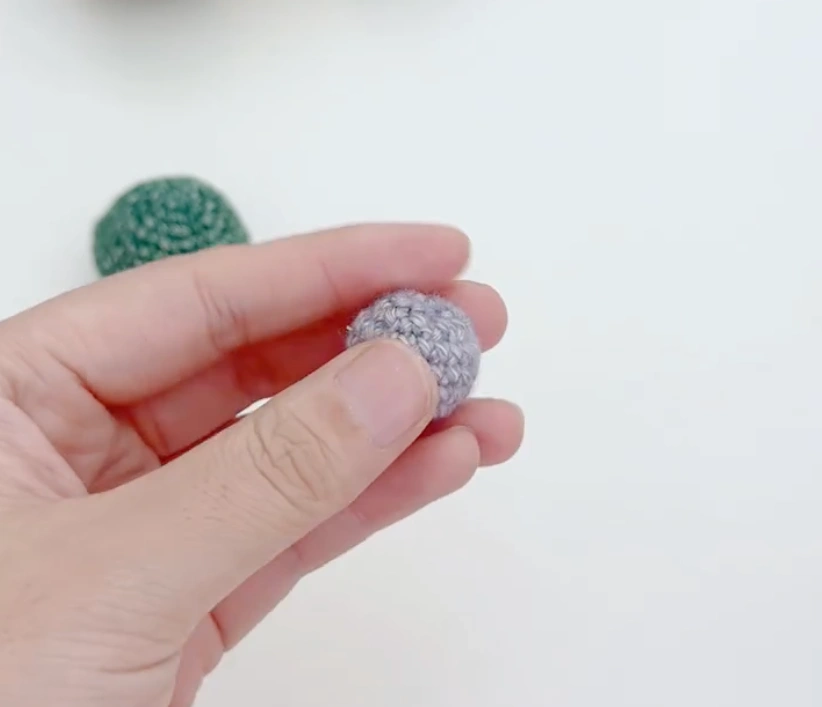
Make 5 pieces in total: 4 legs and 1 tail.
Use green yarn.
R1: 5 sc in MR. (5)
R2–R3: sc in each st around. (5)
Fasten off and weave in the yarn end. If you prefer to sew the pieces on instead of using glue, leave a longer tail for each piece.
Use 4 of these pieces as the turtle legs. Use the remaining piece as the tail.
Do not stuff the legs or the tail. They are very small, and leaving them unstuffed makes them easier to flatten slightly and attach neatly to the turtle body.
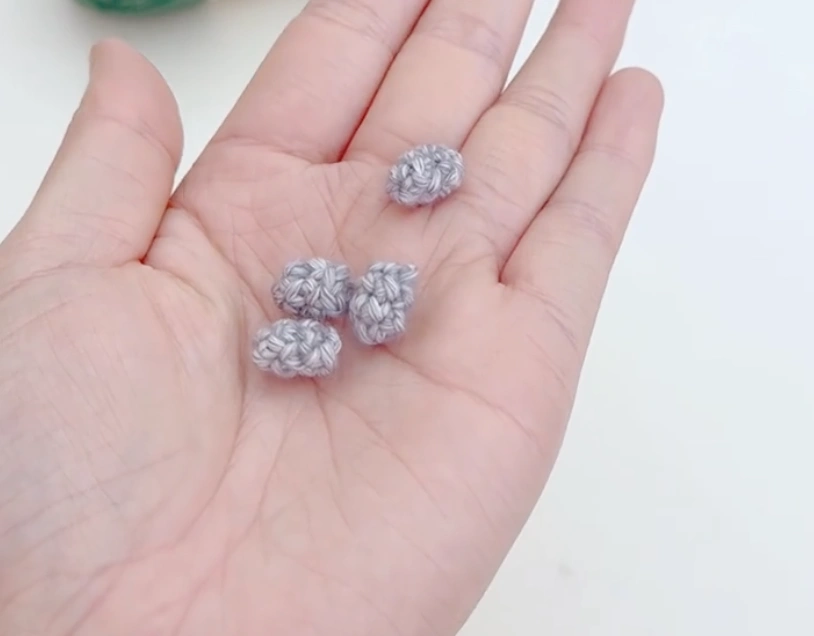
Assembly
For this mini turtle, I used glue to attach the head, legs, and tail. Before gluing anything down, place all the pieces around the body first so you can check the shape and make small adjustments.
- Glue the head to the front of the turtle body.
- Glue four small pieces around the lower edge of the shell as the legs.
- Glue the fifth small piece to the back of the turtle body as the tail.
- Press each piece gently in place for a few seconds.
- Let the glue dry completely before moving the turtle too much.
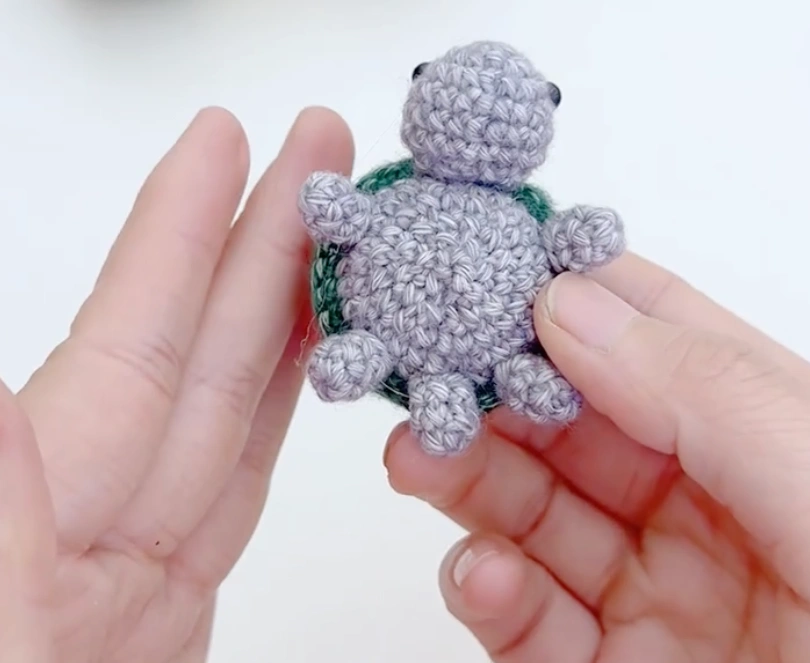
After everything is secure, you can gently shape the shell, belly, legs, and tail with your fingers. Tiny projects do not always look perfectly balanced right away, so I like to adjust the shape slowly at the end.
Little Things That Might Feel Confusing
If the Shell Edge Feels a Little Strange
The shell edge may feel a little unusual because you are working into only part of the stitch for the later shell rounds. This is what creates the small rim around the turtle shell.
If you are not sure whether you are doing it correctly, look for the unused loops left inside the shell after R8. Those inside loops are important because you will use them later to start the belly.
When the Belly Opening Starts Getting Small
The belly is the best place to add stuffing because it closes the turtle body from underneath. I like to start stuffing before the opening becomes too small, while I can still adjust the shape with my fingers.
Add the stuffing little by little instead of pushing in one large piece. The body should feel full, but not so tight that the shell becomes too round or the stitches start stretching open.
If Your Turtle Looks Too Round
A tiny turtle can easily turn into a little ball if it is overstuffed. If that happens, gently press the shell and belly before the final opening is fully closed.
I prefer the body to stay slightly soft, so the shell still has a turtle-like shape instead of becoming a perfect sphere.
Why I Do Not Stuff the Legs and Tail
The legs and tail are very small, so I leave them unstuffed. This makes them easier to flatten slightly and place neatly around the turtle body.
If you add stuffing to these tiny pieces, they may become too bulky and harder to attach, especially if you are using glue for the final assembly.
Before You Glue the Pieces in Place
This is the step where I slow down a little. The pieces are tiny, so even a small shift can change the turtle’s expression and overall shape.
I like to place the head, four legs, and tail around the body first without glue. Check the turtle from the top and from the side. Once it looks balanced, glue one piece at a time and let everything dry completely.
If You Want a Stronger Finish
Glue is quick and helpful for such a tiny project, but sewing is usually stronger if the turtle will be handled often.
If you are making this turtle for a child, a keychain, or anything that may be pulled or squeezed, sewing the pieces on is the safer choice. For a small desk decoration or photo prop, glue can work well as long as you let it dry fully.
What to Try Next
If this little turtle made you want to keep crocheting, here are a few beginner-friendly projects and stitch guides that fit naturally after this one:
- Tiny Crochet Cat — another small animal project with a cute finished shape.
- Crochet Bunny Brooch — a sweet beginner project if you like tiny animal makes.
- Crochet Fish Pattern — a simple small project that pairs nicely with the turtle theme.
- Single Crochet Magic Ring — helpful if starting the shell, head, or legs felt confusing.
- Single Crochet for Beginners — a useful refresher because this turtle uses so much single crochet.