
Sometimes the best crochet projects start with the tiniest bits of leftover yarn.
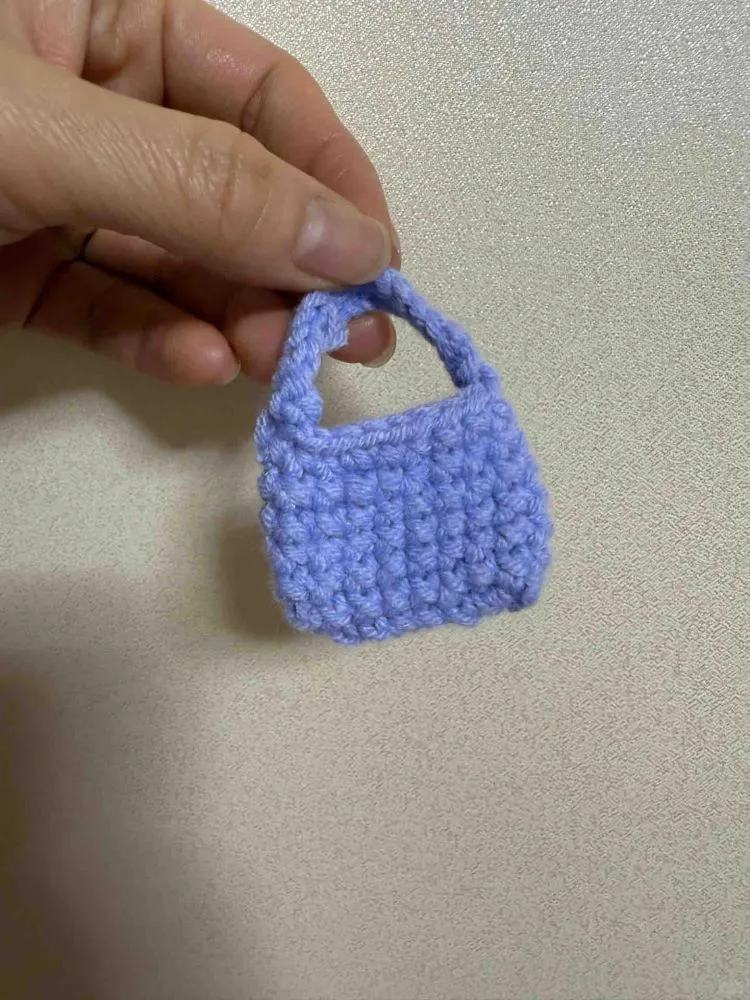
I had a few short strands sitting on my desk that felt too small for a “real” project, but I didn’t want to throw them away either. So I tried turning them into something simple — just a tiny pouch that could hold small things like earbuds, coins, or stitch markers.
What surprised me was how quickly it came together.
This little crochet pouch takes only a few minutes to make, and the pattern is simple enough for …beginners who already know how to chain and make a single crochet.
The base is a small oval, the sides are just straight rounds, and the strap is nothing more than a short chain — basically the same idea as an easy crochet bracelet (chain stitch) .
In other words, it’s the kind of project you can finish almost as soon as you start — which is honestly one of the most satisfying feelings when you’re learning crochet.
If you have a few scraps of yarn and a small hook nearby, you can probably make one right now.
See the Full Process in the Video
If you prefer learning by watching, the video below shows the entire pouch from start to finish.
You’ll see how the small oval base is built, how the sides naturally form once you stop increasing, and how the simple chain strap turns it into a tiny bag. The whole project is short enough that you can easily pause, crochet a few stitches, and then continue.
Some beginners find that seeing the stitch placement once on video makes the written pattern much easier to follow afterward. So feel free to watch it first, or keep it open as a visual guide while you crochet along.
Mini Crochet Pouch (3-Minute Yarn Scrap Bag)
A tiny crochet pouch made from beginner-friendly yarn. This quick project creates a small oval base and simple sides, perfect for storing small items or as a cute accessory. If you’ve never crocheted into an oval before, it helps to practice on a simple round first — like this beginner double crochet circle.
Abbreviations (US Terms)
- ch = chain
- sc = single crochet
- inc = increase (2 sc in same stitch)
- sl st = slip stitch
- st = stitch
Pattern
Start
Ch 4.
Round 1
Work into the second chain from hook.
2 sc in next 2 chains,
3 sc in last chain.
Continue working on the other side of the chain:
1 sc,
2 sc in last chain.
Total: 10 sts
(This creates a small oval base.)
Round 2
Inc,
1 sc,
3 inc,
1 sc,
2 inc.
Total: 14 sts
Round 3 – Round 6
Sc in each stitch around.
14 sts each round
This builds the height of the pouch.
Round 7 (Edge)
(sl st, ch 1) in each stitch around.
This creates a slightly textured edge.
Fasten off.
Strap
Attach yarn to one side of the pouch.
Ch 25.
Attach the chain to the opposite side of the pouch with a slip stitch.
Fasten off and weave in ends.
Finished Size
Small mini pouch suitable for:
- earbuds
- coins
- tiny accessories
- decorative mini bags
A Tiny Project That’s Surprisingly Satisfying
One thing I’ve noticed while learning crochet is that finishing something small can feel incredibly motivating.
Projects like this mini pouch don’t take much yarn, they don’t take much time, and there’s very little pressure to make everything perfect. You can simply enjoy the process and end up with something cute and useful at the same time.
If you enjoyed making this tiny pouch, you might also like trying a few other beginner projects. A simple single crochet coaster is a great way to practice even stitches, while a mini crochet scarf helps you get comfortable crocheting longer rows.
And if you want another quick project that uses the same basic chain stitch, you could also try making an easy crochet bracelet.
Small projects like these are one of the easiest ways to build confidence with crochet — and they’re also perfect for using up leftover yarn.