When I first started crocheting, I thought the chain stitch was the easiest part. It’s the very first thing everyone learns, so I assumed once I got it, I could stop thinking about it. If you’re brand new and want a simple roadmap, start here: Start Here.
But the longer my chain became, the more something felt off.
Some parts of the chain looked tight and stiff. Other sections felt loose and uneven. The whole chain lacked that soft, relaxed look I kept seeing in photos and tutorials. At first, I blamed my hands. I thought maybe I just wasn’t steady enough yet.
It took me a while to realize this wasn’t really a “skill” problem at all.
What I was struggling with had much more to do with how my body was holding the yarn, how I was breathing, and how much tension I was carrying without noticing. Once I understood that, my chains started to change — not because I learned a new technique, but because I changed small habits I didn’t even know I had.
If your chain stitches don’t feel right yet, you’re not doing anything wrong. There’s usually a reason — and it’s often easier to fix than you think.
Tools
Before we start, let’s keep the tools simple — really simple.
You don’t need a full crochet kit. You don’t need extra accessories. And you definitely don’t need to buy everything you see recommended online.
For this tutorial, keep it simple.
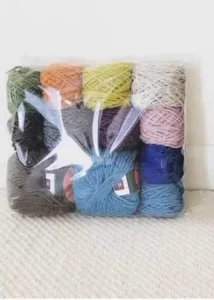
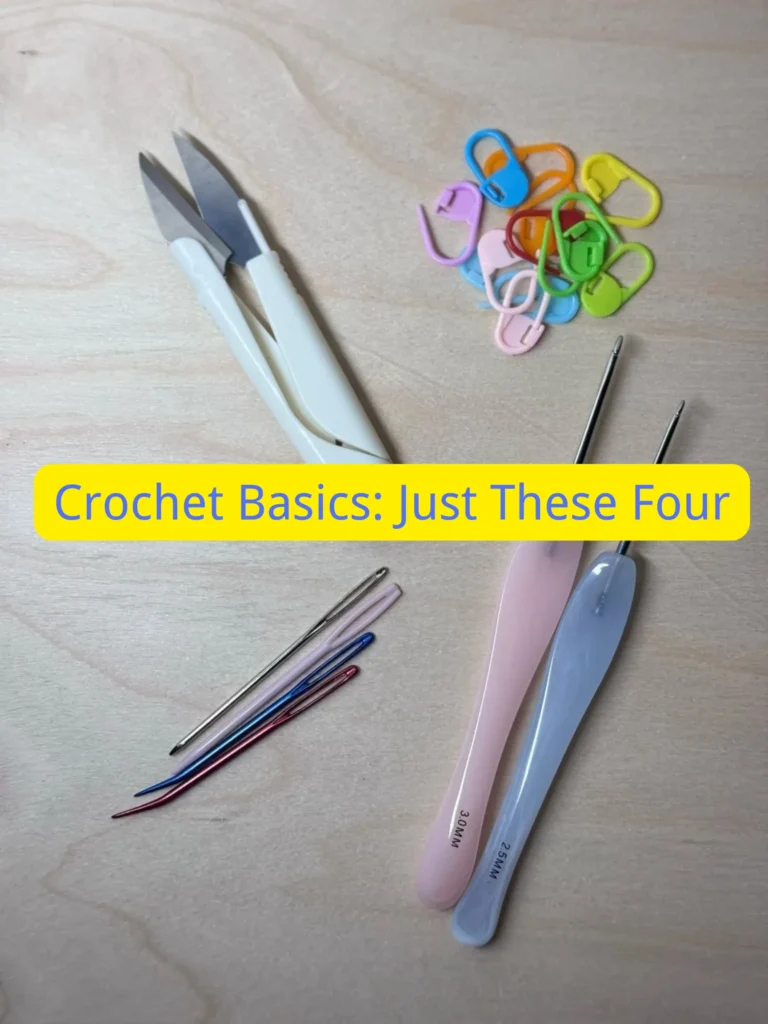
All you need is beginner-friendly yarn that doesn’t split easily, a comfortable crochet hook around 3.0–4.0 mm, and a pair of scissors. The most important thing is that you can clearly see your stitches as you work. We’ll use a yarn needle later to finish off, but you don’t need it just yet.
That’s everything you need to make your first chain.
No backups. No “just in case” tools. Starting simple makes it much easier to focus on what actually matters — how the yarn moves, and how your hands feel as you crochet.
How to Hold Your Hook
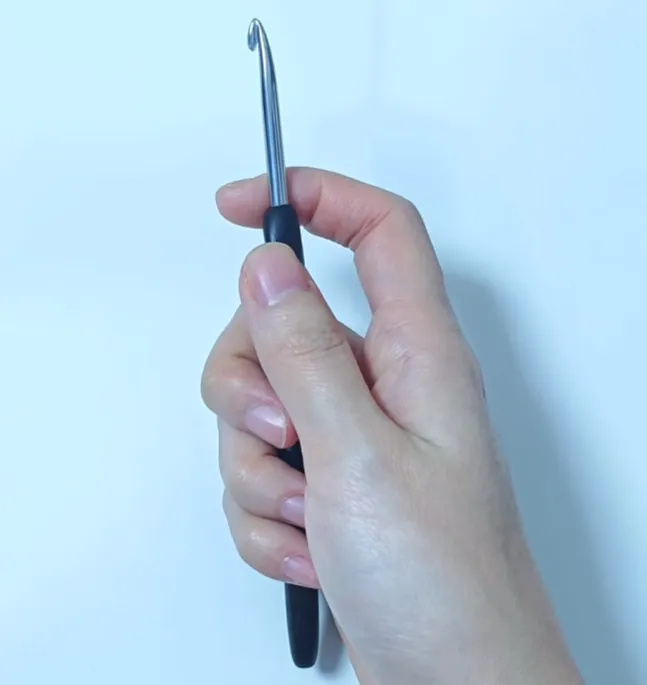
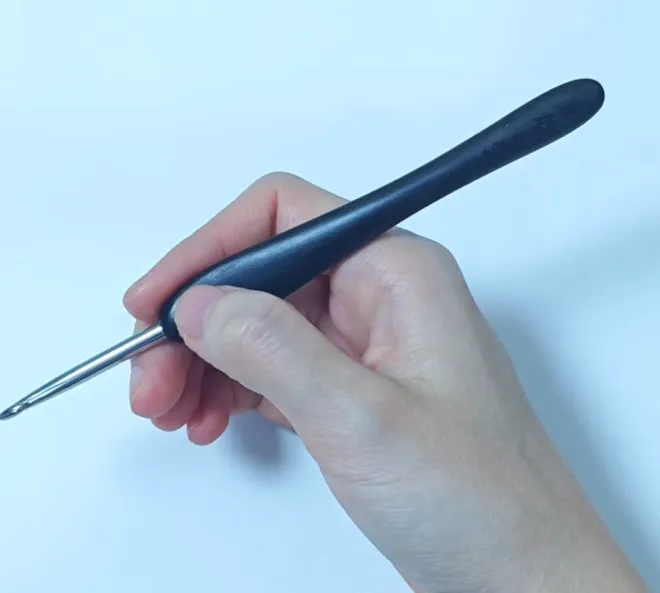
There are two common ways to hold a crochet hook: the knife hold and the pencil hold — and both are perfectly fine. There is no “correct” way to hold your hook. What matters is what feels relaxed and natural in your hand.
I personally use the knife hold because it feels more comfortable for me, but you should choose whatever lets you crochet without tension.
Slip Knot
Every crochet chain starts with a slip knot.
A lot of tutorials assume you already know how to make one — but honestly, this is where many beginners get stuck.
To make a slip knot:
- Make a loop with your yarn
- Pull the working yarn through the loop
- Place the loop onto your hook
The most important part: don’t tighten it too much.
Your slip knot should slide easily up and down the hook. If it feels stiff or stuck, loosen it slightly before you continue.
Once your slip knot is on the hook, you’re ready to start chaining.
How to Crochet the Chain Stitch
This is the foundation of almost everything in crochet. You’ll use it immediately when you learn single crochet.
Take it slow — there’s no rush here.
With your slip knot already on the hook, hold the knot gently between your thumb and middle finger so it doesn’t slide around.
To make a chain stitch:
Bring the yarn over the hook from back to front.
Use the hook to catch the yarn, then pull it through the loop already on your hook.
That’s it.
You now have one chain.
Repeat the same motion again:
yarn over → pull through the loop.
Each time you pull through, you create one new chain stitch.
A small but important detail:
👉 The loop that stays on your hook does NOT count as a chain.
Only the stitches below it count.
Don’t worry if your chains feel a little awkward at first. That’s completely normal. What matters right now is consistency, not speed.
How to Count Chains
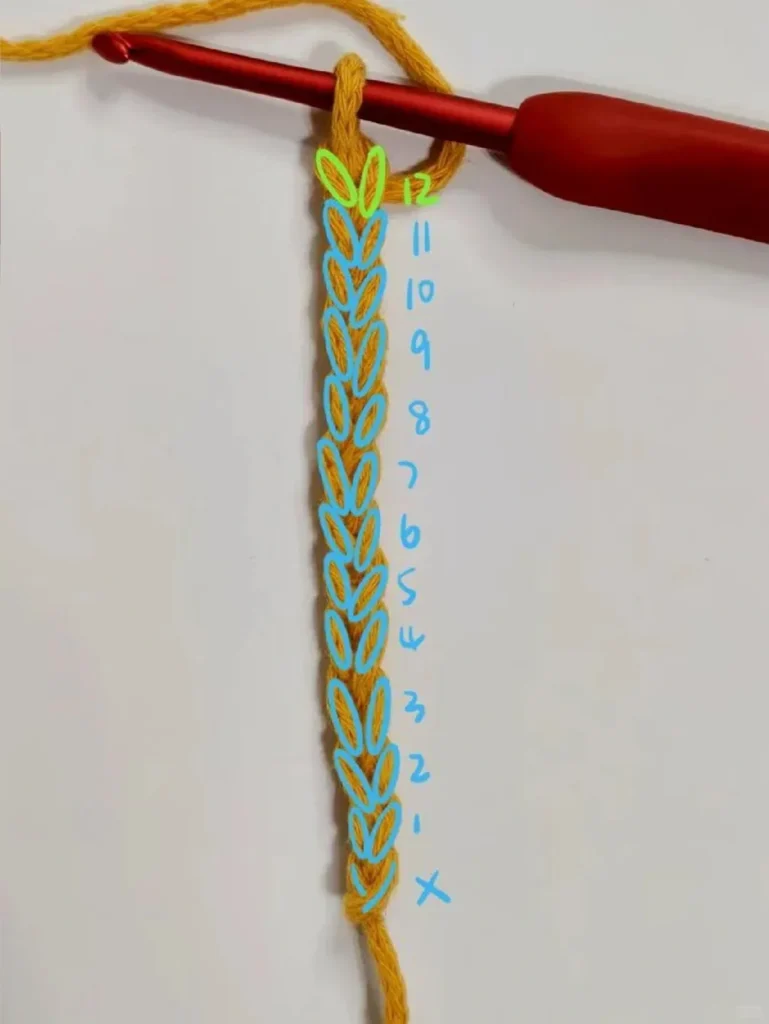
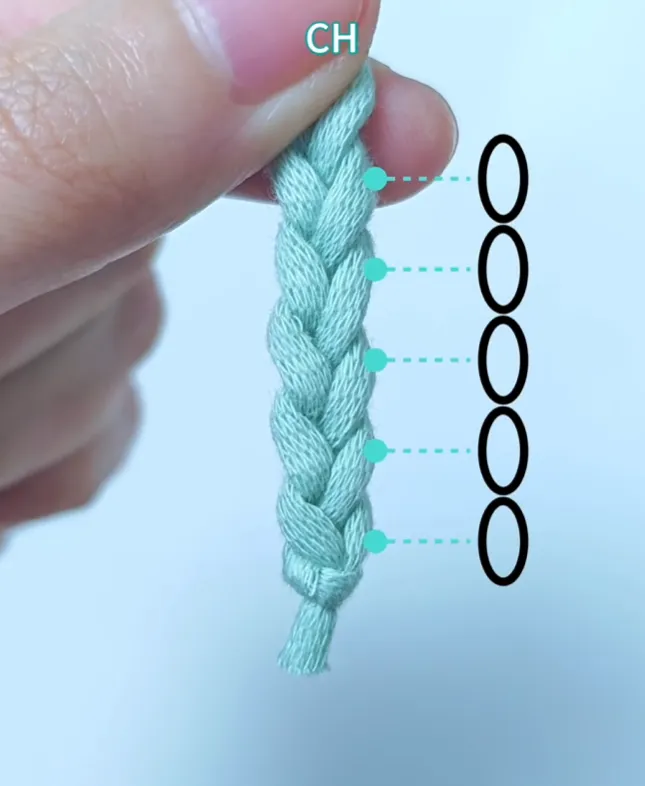
Those V’s are your stitches — the loop on your hook is not counted.
Counting chains can feel confusing at first, but there’s one simple thing to look for.
Turn your chain slightly and look closely — you’ll see a row of small “V” shapes along the edge. If you like learning visually, you might also enjoy my beginner guide to crochet chart symbols.
Each V shape equals one chain stitch.
When counting:
- Count the V’s
- Do not count the loop that’s still on your hook
If you ever lose track, stop, breathe, and start counting again from the first clear stitch. Everyone does this — even after years of crocheting.
Once you can make and count your chains comfortably, everything else becomes much easier.
A Simple Practice
Chain 25 stitches.
Don’t rush this. This exercise isn’t about speed — it’s about feeling what’s happening in your hands.
Here’s a small trick that helped me a lot:
When you’ve made about 6–7 chains, gently bring the tail end of the yarn up and let it rest on the hook side as you keep chaining. You’re not crocheting into it — just letting it hang there.
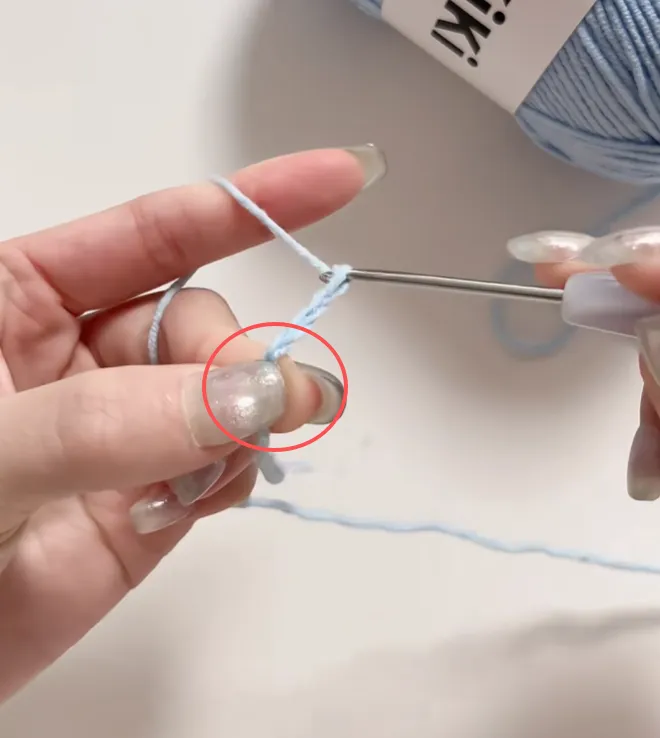
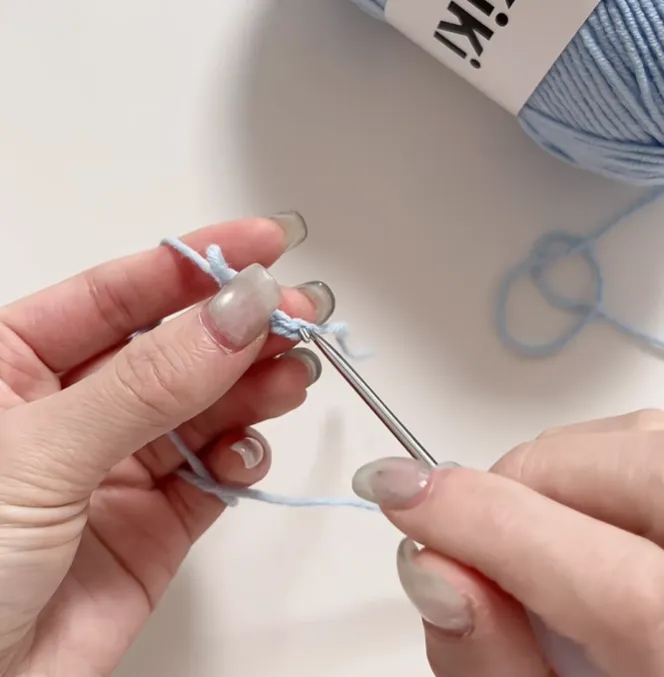
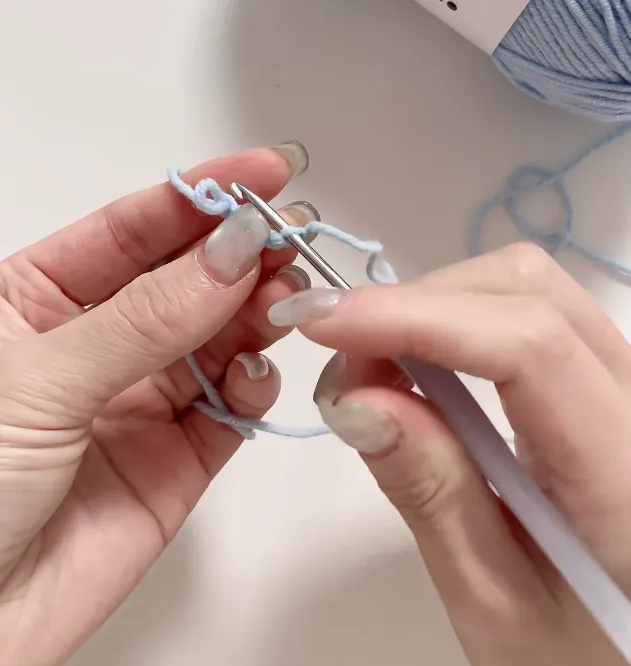
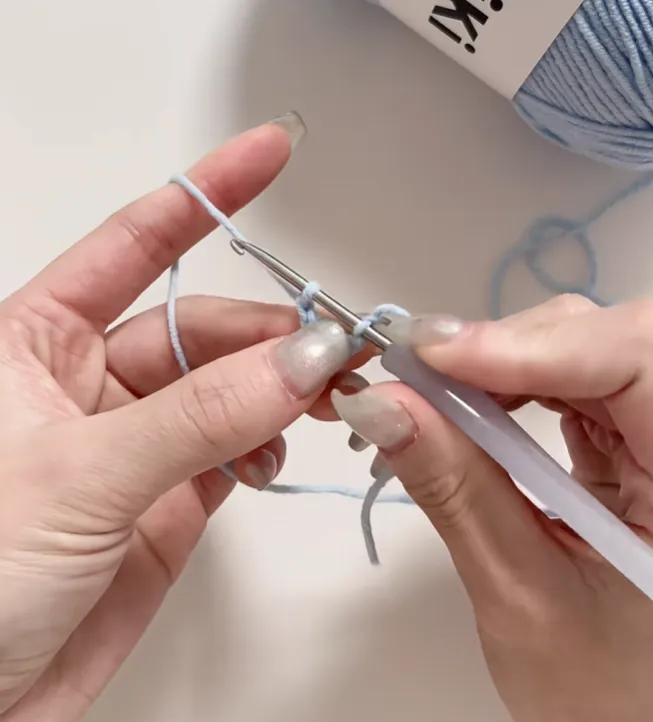
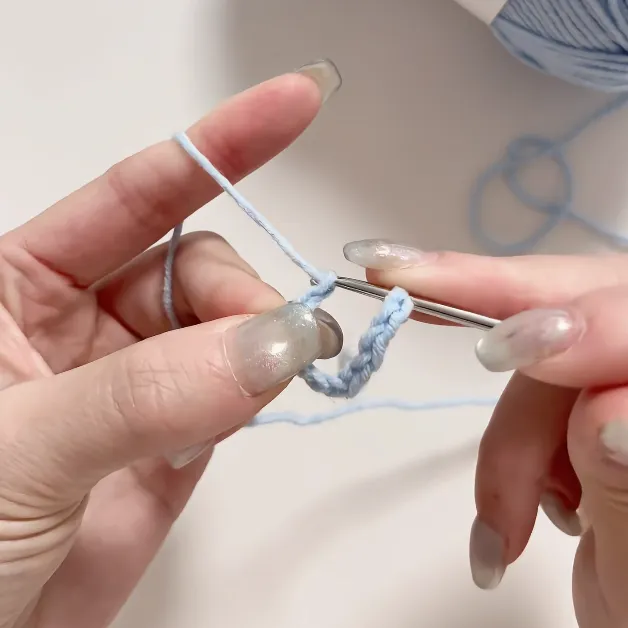
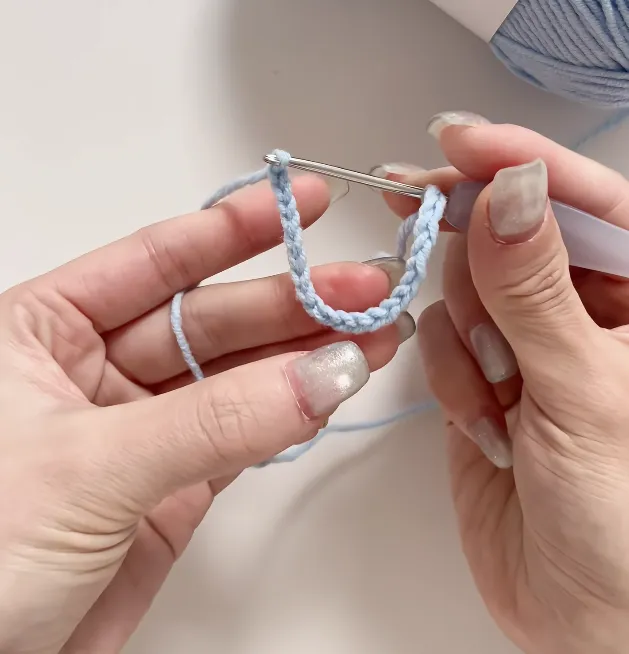
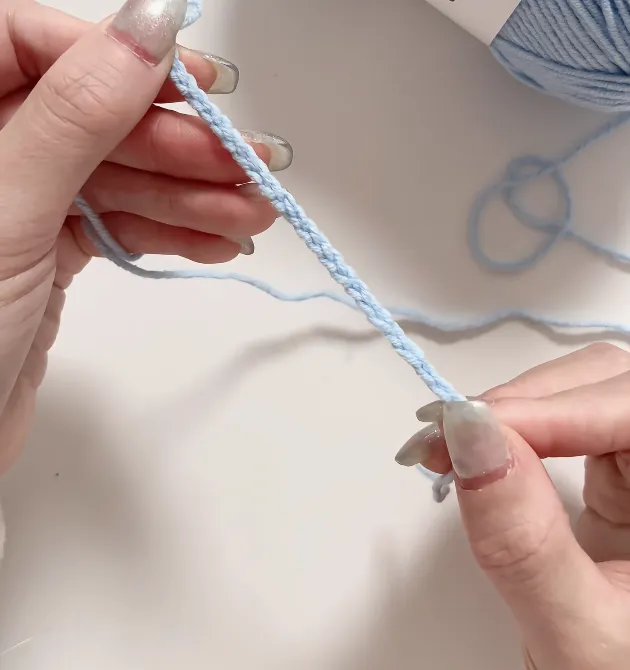
Why this helps:
As the chain gets longer, it naturally wants to twist and curl. Letting the tail hang gives the chain a bit of weight and balance, which helps it stay longer, straighter, and more relaxed.
While you’re chaining, pause occasionally and check:
- Is the chain getting tighter?
- Can your hook still slide easily through each stitch?
- Does the chain look even, not stiff or squished?
If it feels tight, stop. Take a breath. Loosen your grip slightly and continue.
This little practice is enough. Once you can chain comfortably and evenly, you’re ready for the next step — and if you want a tiny win first, try this mini crochet scarf.
Why My Chains Used to Look Uneven
I used to think uneven chains meant I just wasn’t good at crochet yet. I assumed it was a skill issue — shaky hands, not enough practice, maybe I just needed more time. But once I slowed down and actually watched what my hands were doing, I realized it wasn’t about skill at all.
First, my index finger was too stiff.
I was holding it straight and tense, which pulled the yarn tighter than I realized. The chains came out rigid and flat, with no life in them.
Second, I kept gripping the same stitch for too long.
My thumb and middle finger stayed in one spot while I chained. It felt like holding my breath while crocheting. When I finally shifted my grip, the tension suddenly changed — tight sections followed by loose ones.
And finally, my mood mattered more than I expected.
When I felt rushed or impatient, my breathing changed. My hands tightened without me noticing, and the yarn followed my mood.
Once I adjusted these things, everything changed.
My chains became more even. They looked fuller, not squished. And most importantly, crocheting felt calmer.
If your chains look uneven, it doesn’t mean you’re doing it wrong. It usually just means something in your body hasn’t relaxed yet.
Common Chain Stitch Problems
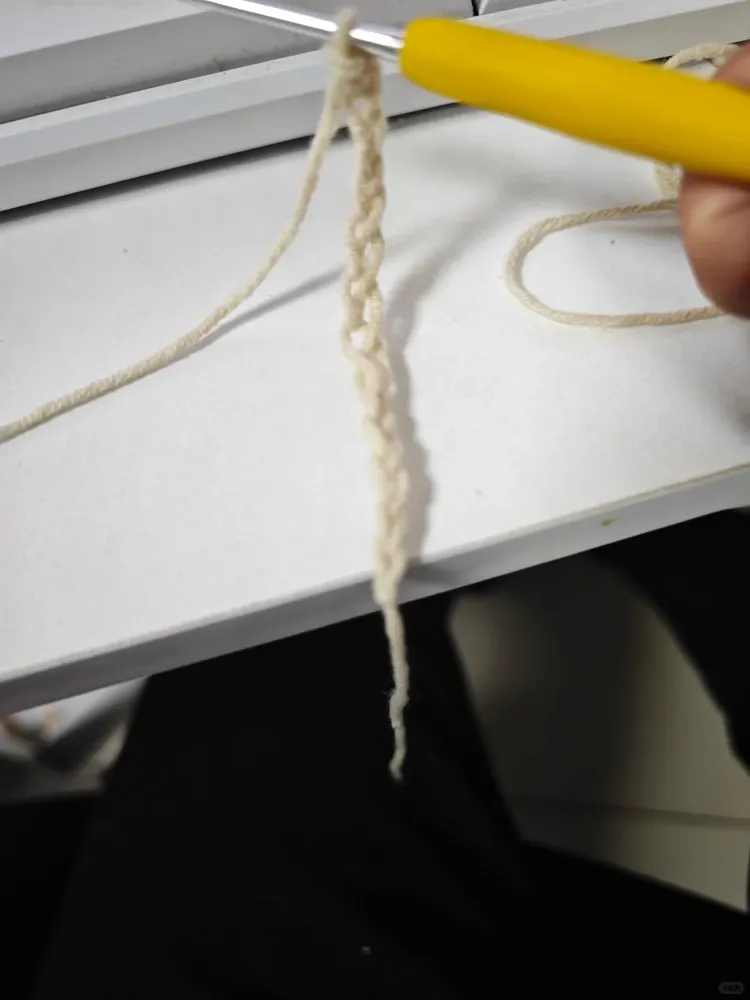
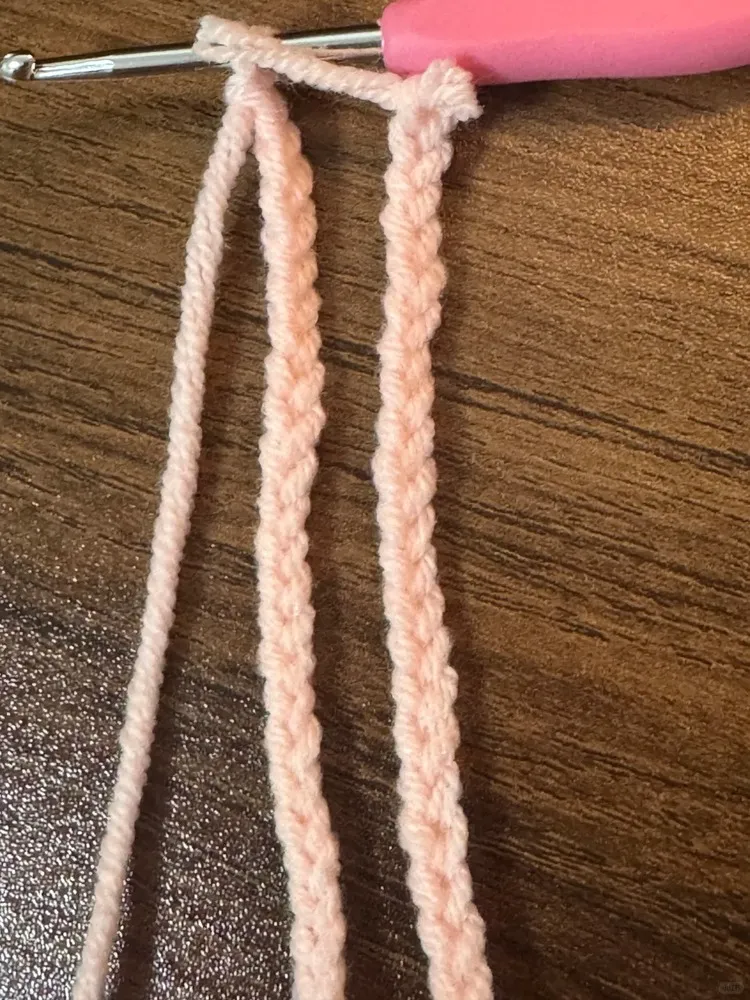
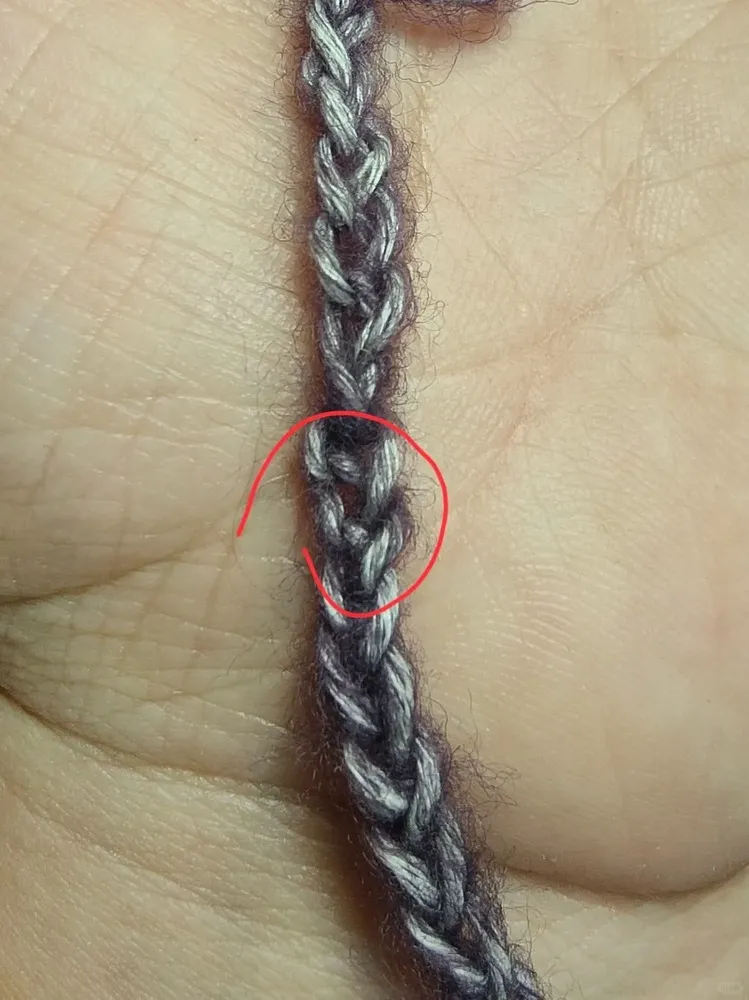
If you’re stuck here, you’re not behind — you’re exactly where most beginners are. Chain stitch problems show up before anything else, and they’re usually the first sign that your hands are still learning how to relax.
Below are the most common issues I see (and experienced myself). Use the examples and photos to match what your chain looks like — each one is a clue, not a mistake.
What to Do Next
Once you can chain comfortably,
and your stitches look relatively even, you’re ready to move on.
👉 Next: Single Crochet for Absolute Beginners
You’ll use the chain you just learned as the foundation for your first real rows.
After single crochet, the next milestone is learning double crochet — it’s taller, faster, and opens up a lot of beginner patterns.
Take a breath — you’re doing great.