If you already know how to make a chain stitch and a single crochet, this project is a great next step.
You don’t need to learn any new complicated stitches to get started. In fact, this coaster is designed specifically for beginners who are still getting comfortable with single crochet and want more practice without feeling overwhelmed.
By the end, you’ll have a simple single crochet coaster with a clean edge and a small hanging loop — something you can use right away, not just a practice swatch.
If you’ve ever felt stuck at the “I only know single crochet” stage, this project is a gentle way to move forward while strengthening the basics that really matter. And if you still feel like you’re missing the “what do I do next?” roadmap, you can always start from Start Here — it’s the easiest way to find your next small win. (My other favorite first project is the mini crochet scarf when you want something wearable but still beginner-simple.)
What You’ll Practice in This Project
This project focuses on building comfort with the basics — nothing advanced, nothing overwhelming.
As you work through this coaster, you’ll practice:
- Chain stitch (foundation chain)
- Single crochet
- Working into the back loop only (BLO)
- Turning your work at the end of each row
- Slip stitch for joining and finishing
- A simple edging around the coaster
- Making a small hanging loop
You don’t need to master all of these before you start.
This project is designed so you can learn them naturally as you go, one step at a time.
Tools & Materials
You don’t need anything special to start this project.
This is meant to be a practice piece, not a precision project — so feel free to use what you already have. If you’re still unsure what to pick, I also wrote a beginner-friendly guide on the best yarn for crochet beginners and a simple breakdown of crochet hooks for beginners.
Here’s what I’m using, and what you can substitute:
- Yarn
I’m using a 5-ply yarn for this coaster.
You don’t need the exact same yarn — any smooth yarn you’re comfortable working with will work just fine. - Crochet hook
I’m using a 2.5 mm crochet hook.
If your yarn is thicker or thinner, simply choose a hook that matches your yarn. There’s no “wrong” size here. - Yarn needle
For weaving in ends when you finish. - Button (optional)
This is only needed if you want to add the small hanging loop and button closure.
You can skip this part entirely if you prefer. (And if you’re the kind of beginner who likes everything packed neatly in one box, here’s my honest take on whether crochet kits are good for beginners.)
Different yarn weights and hook sizes will change the look slightly — bigger, smaller, tighter, looser — but they all work.
This coaster looks great in many sizes, which makes it perfect for practice.
Watch the Video First (Highly Recommended)
This project works best if you crochet along with the video.
I recommend watching it once from start to finish, or pausing and following along step by step.
The pace is intentionally slow and beginner-friendly.
Use the written steps and photos below to check your stitch count or review a step whenever you need. If you’re curious about patterns later (especially the ones that look like “little hieroglyphs”), you can bookmark this beginner guide on how to read crochet chart symbols. You don’t need it for this coaster — but it’s a nice next step when you start exploring written patterns.
Step-by-Step: Making the Coaster
Below you’ll find the step-by-step instructions for making this single crochet coaster.
Follow the steps in order and crochet along with the video. Each photo shows exactly what the stitches should look like at that stage, so you can use them to check your progress as you go.
Take your time, focus on one step at a time, and don’t worry about small imperfections. This project is meant to help you practice and build confidence with single crochet.
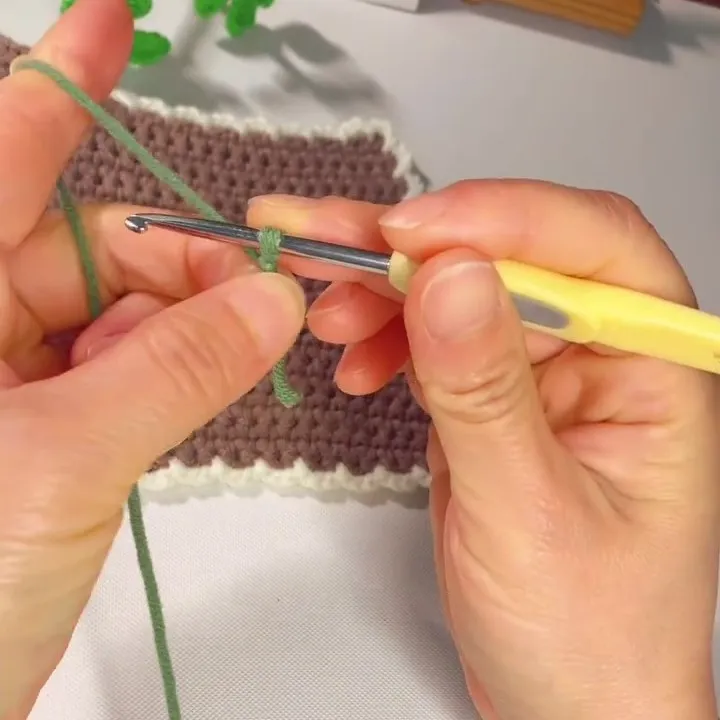
Make a slip knot and place it on your hook.
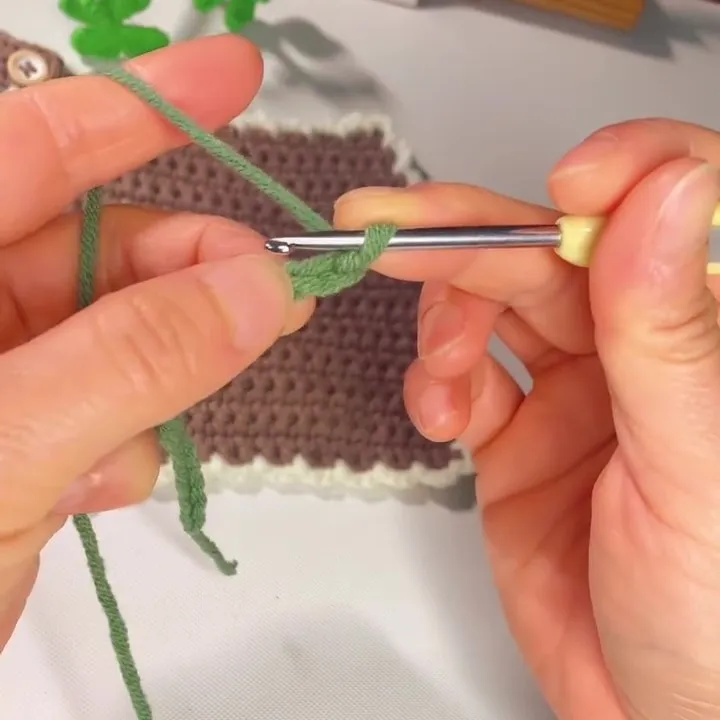
Chain 21 stitches to begin the first row.
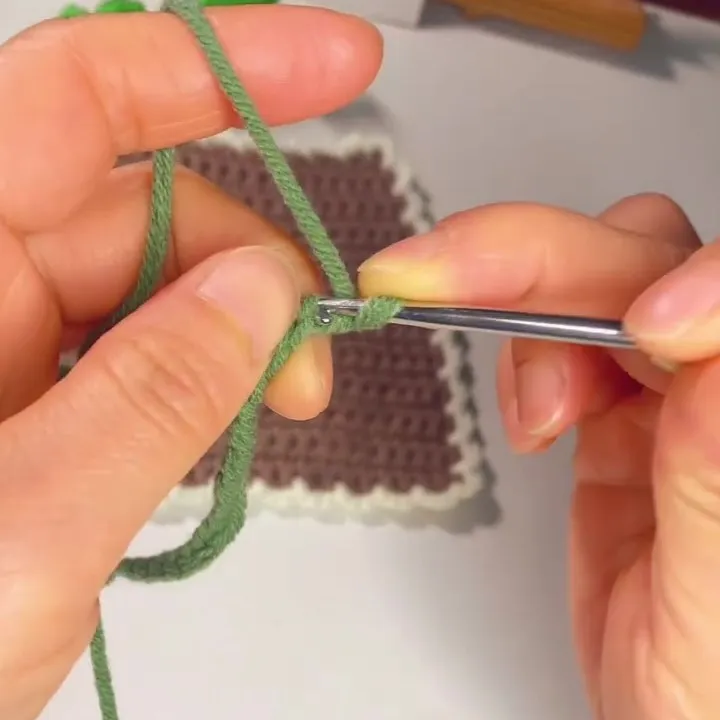
Turn your work to begin Row 2.
Starting from the second chain from the hook, insert your hook into the back loop only of the chain, and make a single crochet.
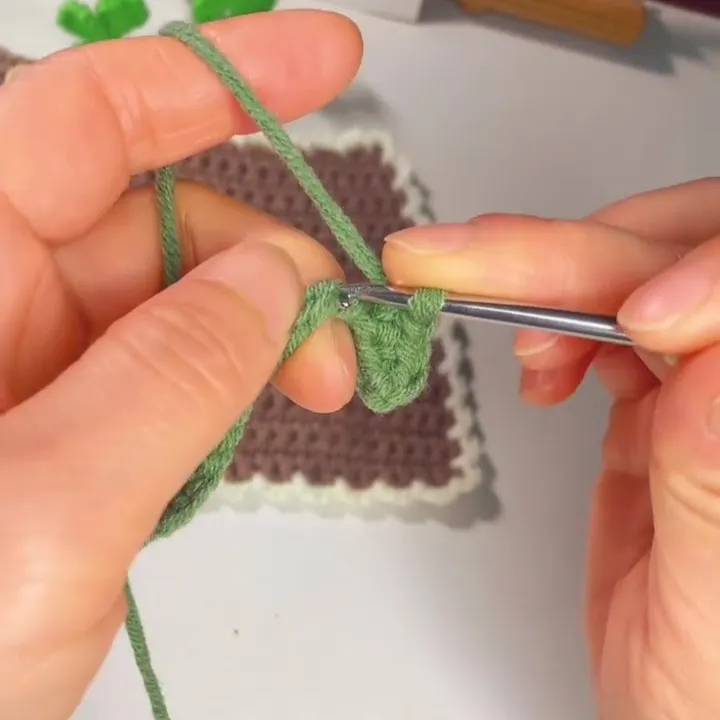
Continue working across Row 2.
Make 20 single crochets, inserting your hook into the back loop only of each chain.
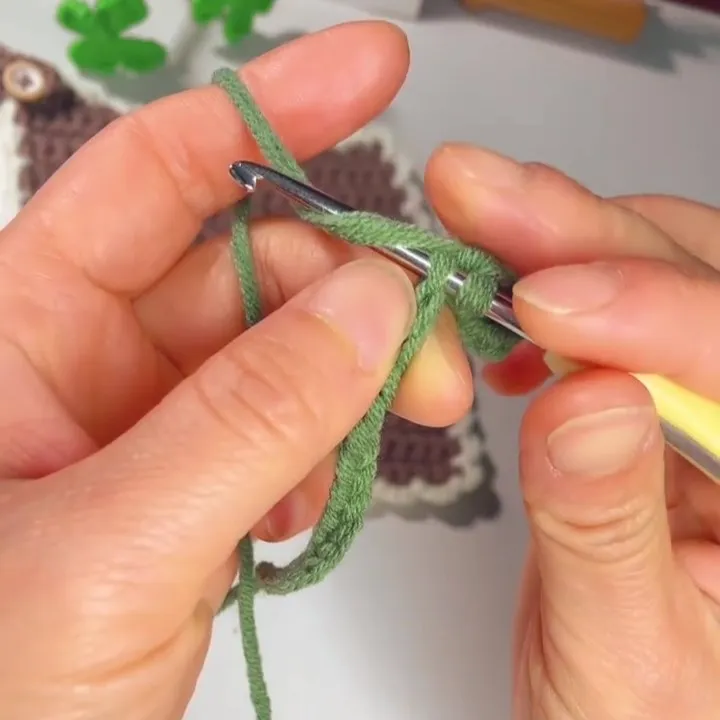
After inserting your hook into the back loop, yarn over in this direction, as shown in the photo.
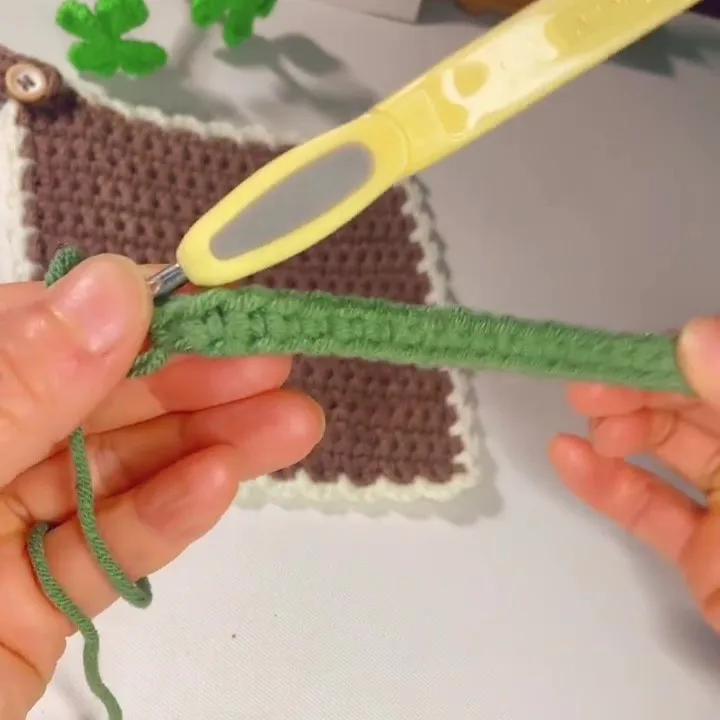
You have now completed Row 2.
There should be 20 single crochet stitches across the row, all worked into the back loop only.
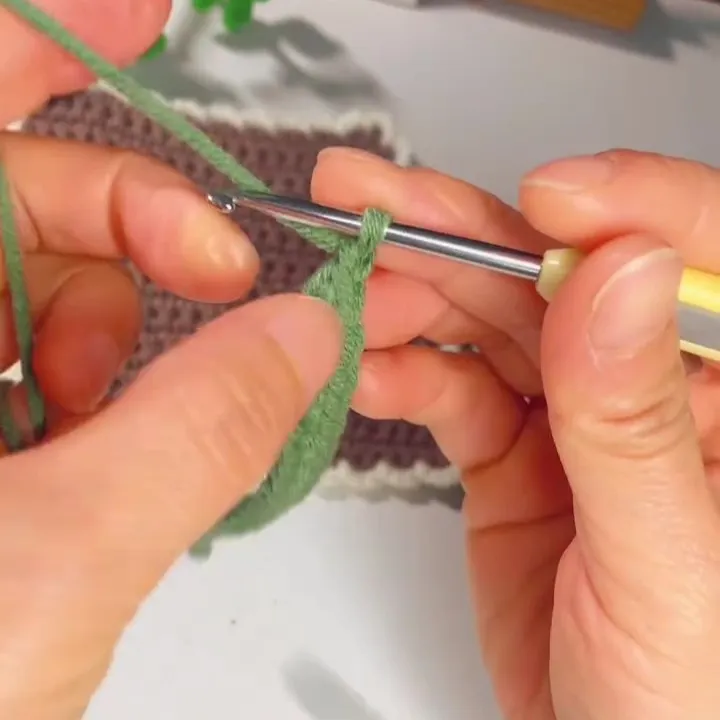
Chain 1 stitch to create a turning chain.
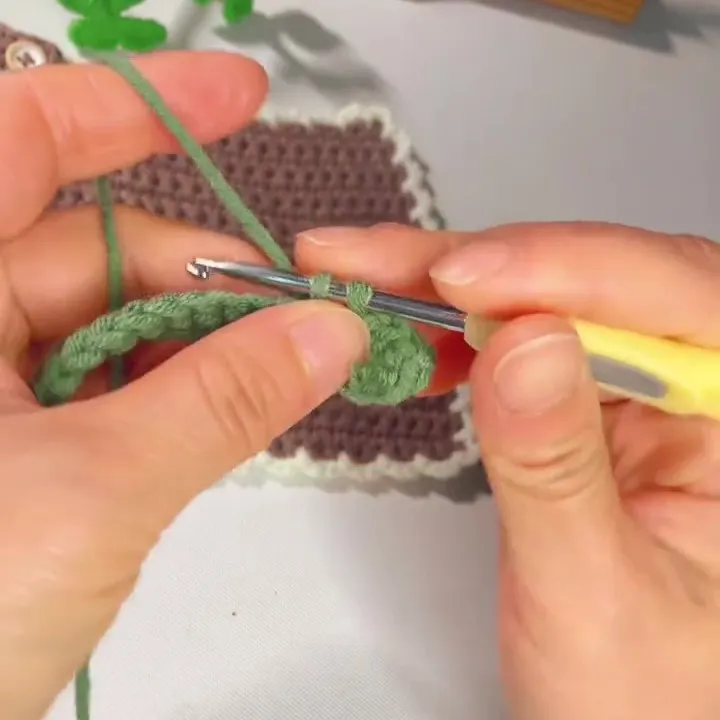
Turn your work to begin Row 3.
Make 20 single crochet stitches across the row, working under both loops this time
(not into the back loop only).
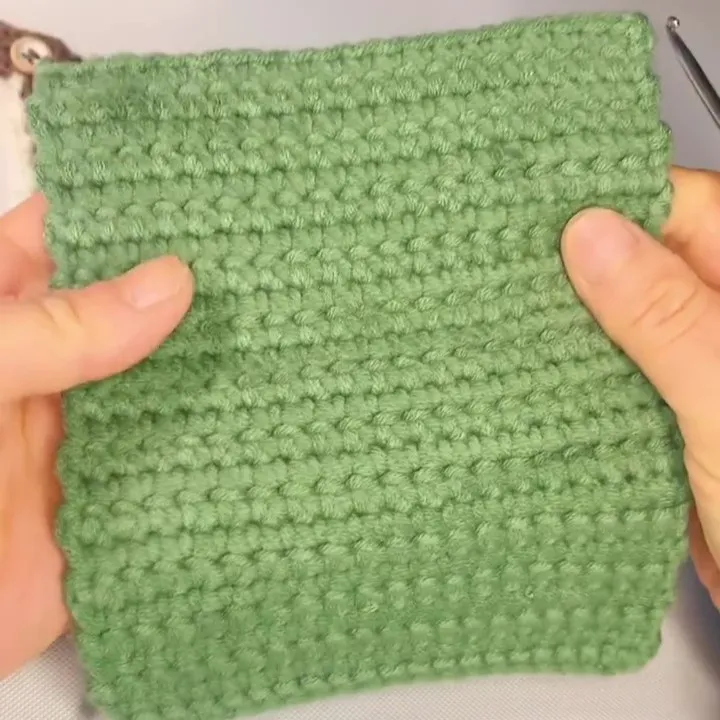
Continue crocheting in the same way, repeating the previous rows.
After completing 20 rows in total, you will have a square-shaped crochet piece made mainly of single crochet stitches.
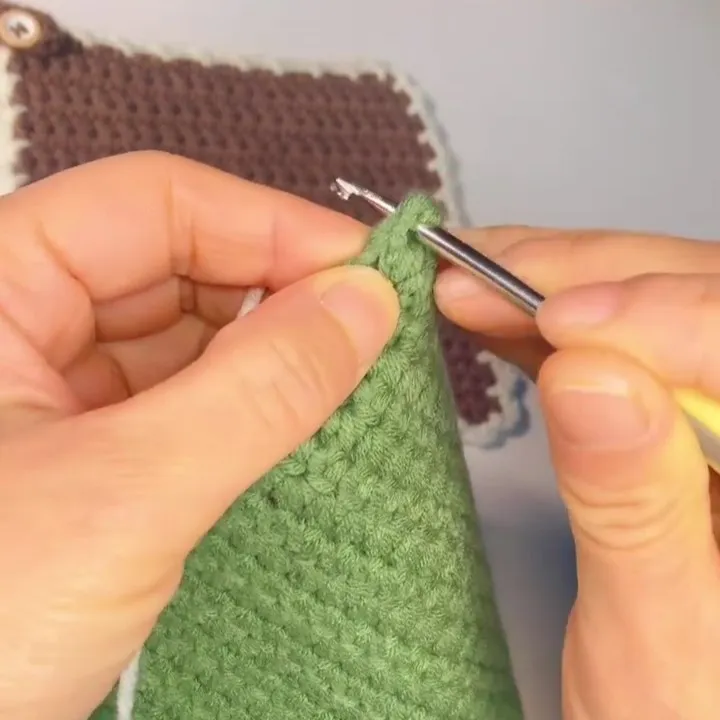
Now it’s time to crochet the edging.
Choose one corner of the square and insert your hook into the corner stitch to begin the border.
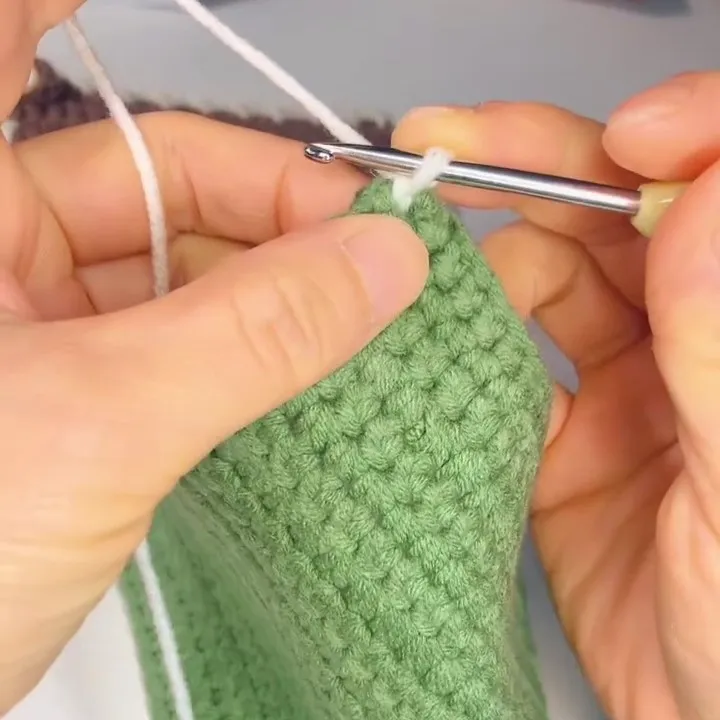
Switch to a new color of yarn.
Insert your hook into the stitch, pull the new color through, and make one slip stitch to join the yarn.
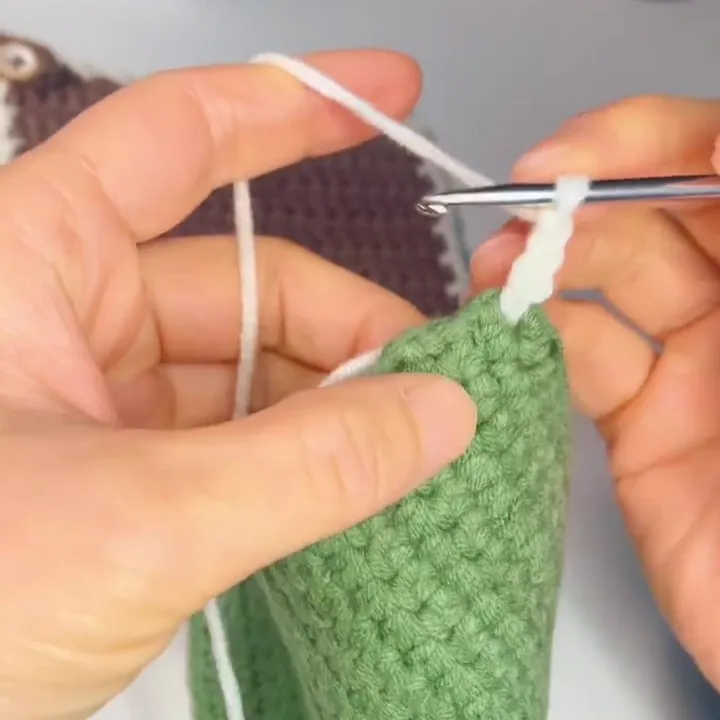
Chain 3 stitches using the new color.
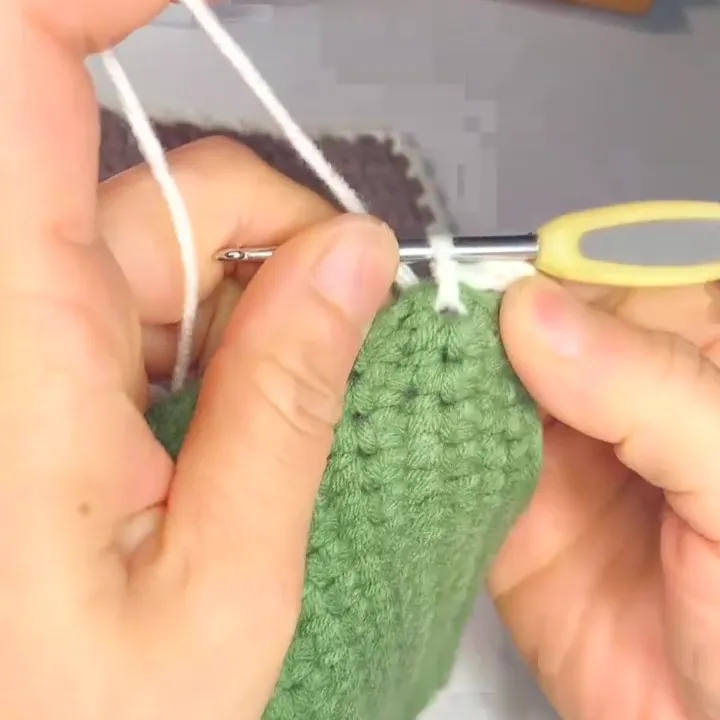
Insert your hook into the next stitch, then make one slip stitch.
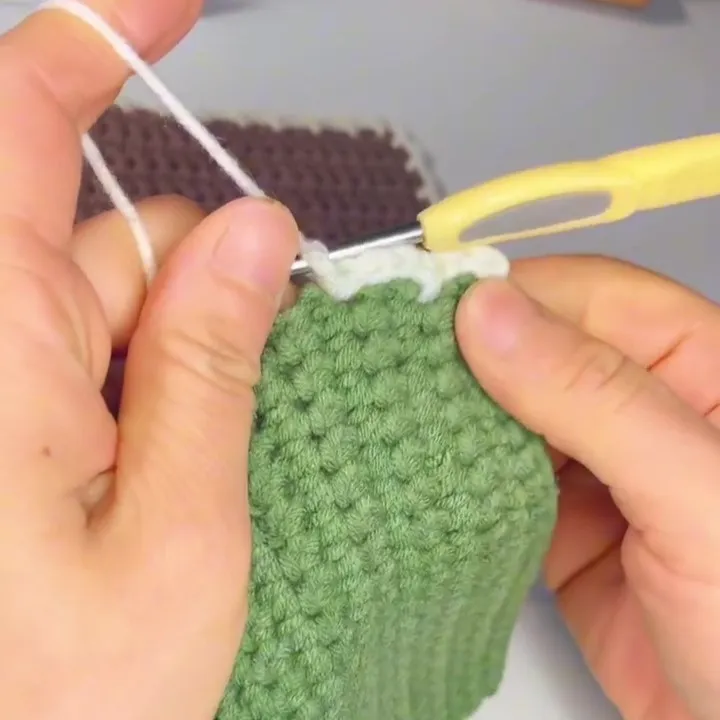
Continue working the edging using the same simple pattern all the way around the square.
The edging repeat is:
Chain 3
Slip stitch into the next stitch
Repeat chain 3, slip stitch evenly along the edge.
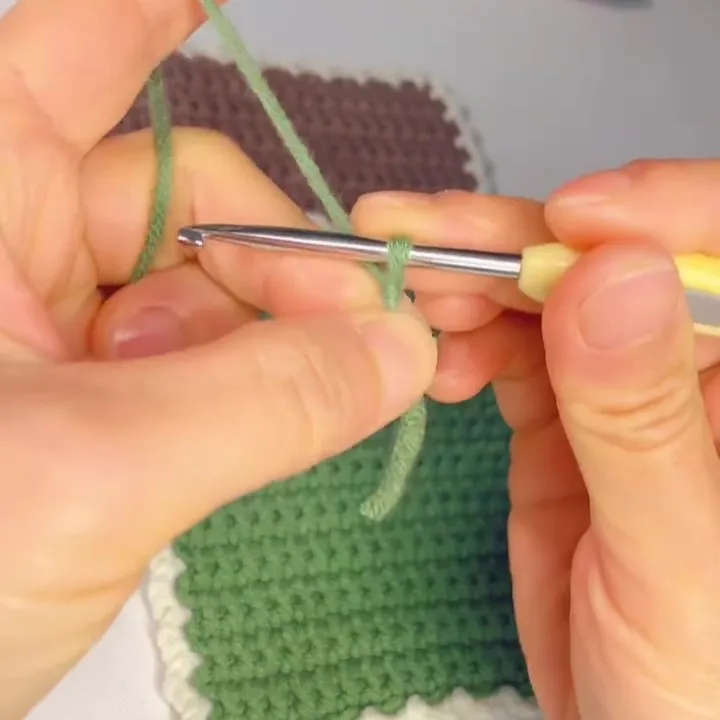
Begin the hanging loop by making a chain stitch.
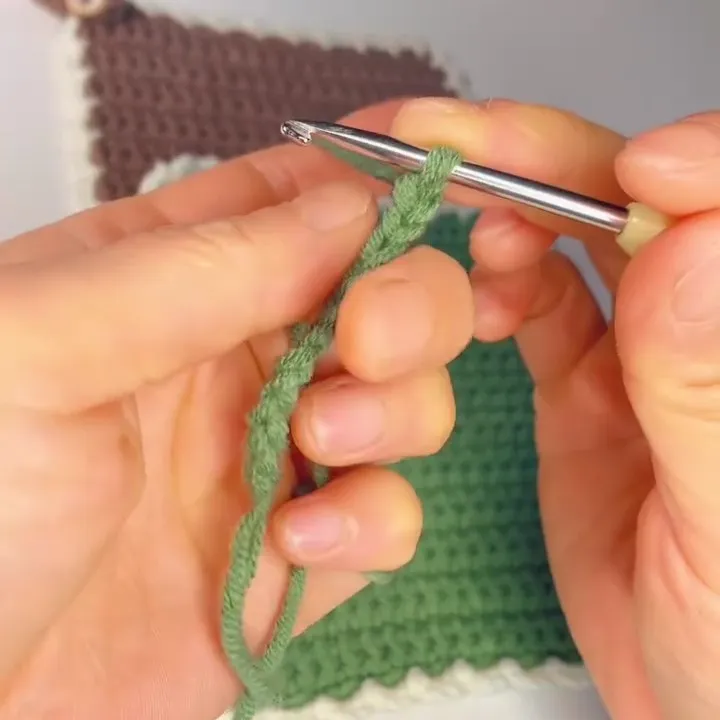
Make 11 chain stitches.
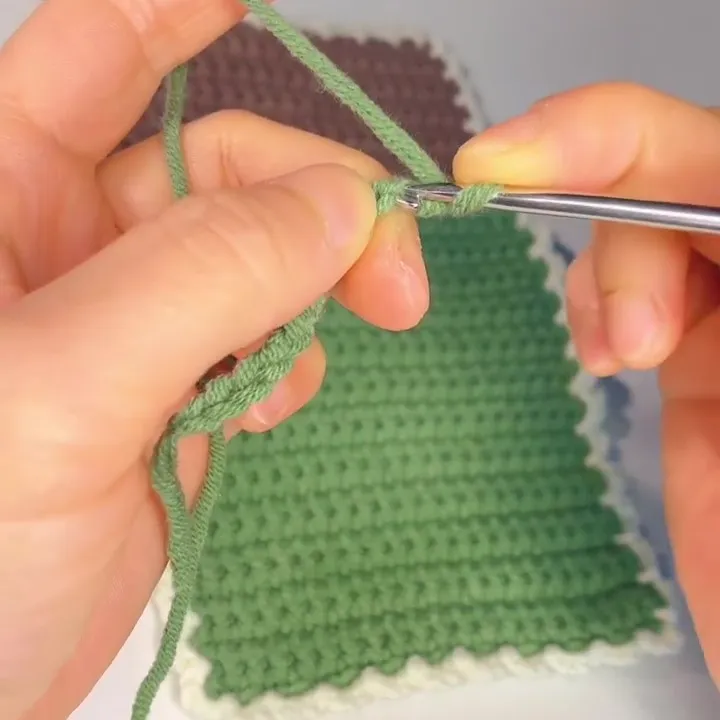
Single Crochet 10 into the Back Bumps
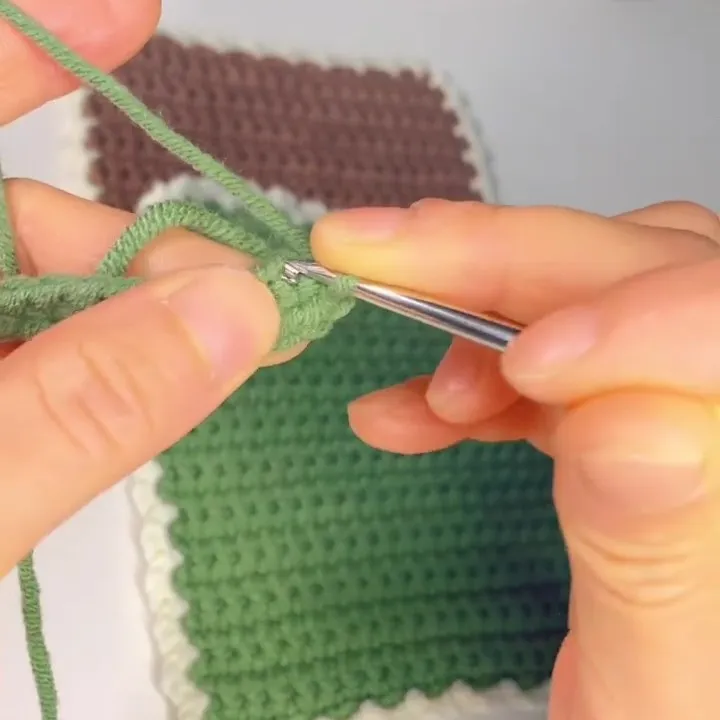
Continue working back along the chain.
This time, make 10 regular single crochet stitches,
inserting the hook under both loops of each chain stitch
(do not use the back bump).
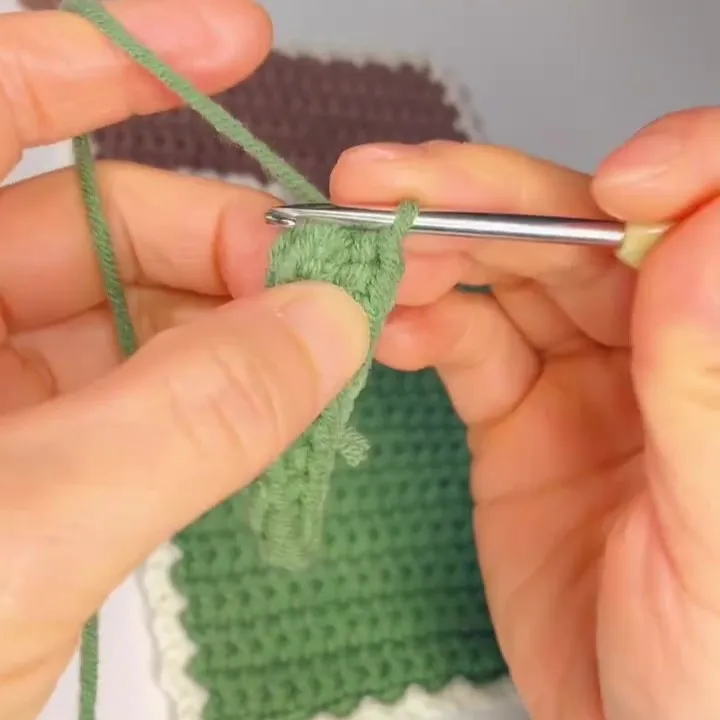
In the last stitch, make an increase:
Work 2 single crochet stitches into the same stitch.
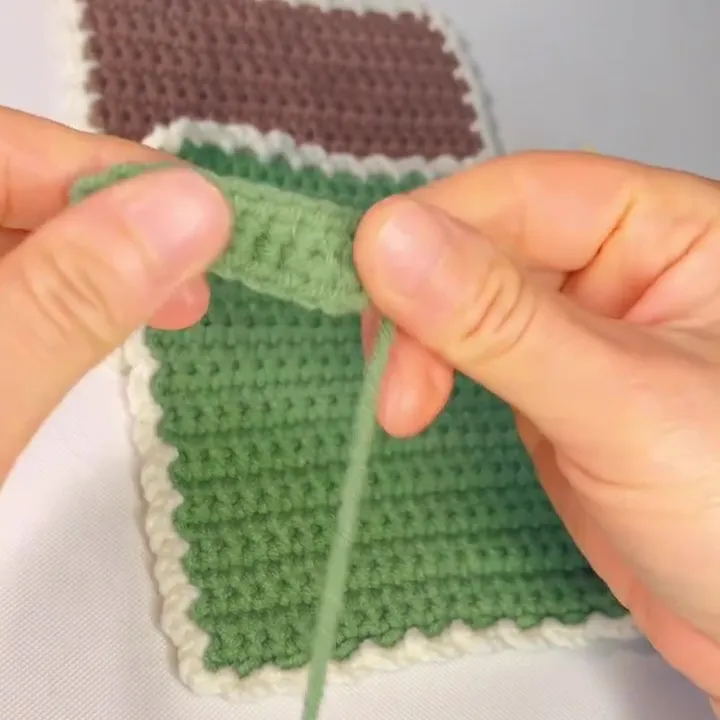
Turn back, then find the first stitch and make a slip stitch to finish the hanging loop.
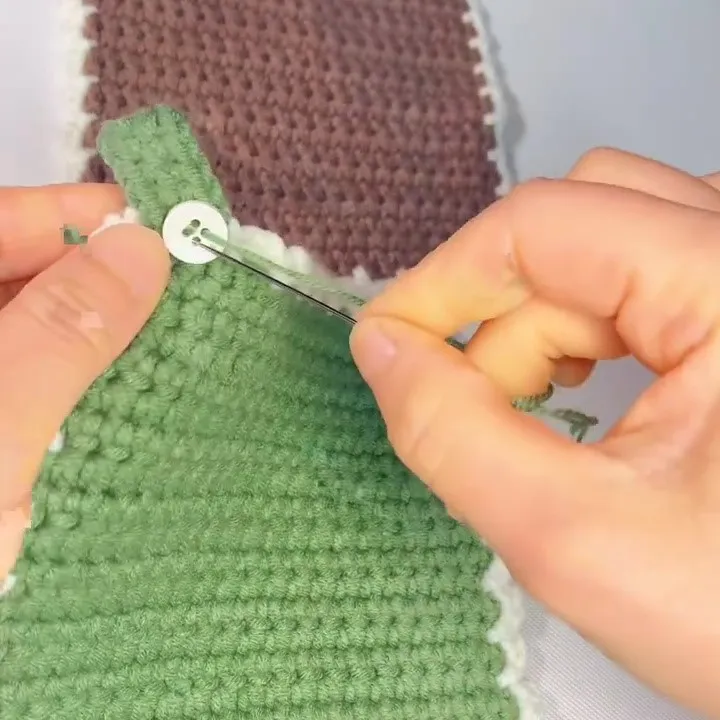
Finally, sew on the button with a needle.
What to Try Next
If you enjoyed this project, here are a few easy ways to build on it:
- Make another coaster in a different color
- Try a larger square by adding more rows
- Add a different edging style
- Practice the same pattern using single crochet only (no back loop)
And when you’re ready to level up just a tiny bit, double crochet is usually the next stitch that makes your projects feel “real” fast — it’s taller, quicker, and super satisfying once your hands get used to the motion.
Small projects like this are one of the best ways to build confidence in crochet.
Each one helps your hands feel more comfortable and your stitches more consistent.