
I love small crochet projects that feel cute from the very beginning, and this little tomato is one of those patterns I would happily make again when I want something quick and relaxing.
The body is simple and round, the leaf top adds just enough detail, and the whole project does not feel too serious. It is a good little amigurumi pattern for practicing increases, decreases, stuffing, and sewing without committing to a large plushie, especially if you are still working through beginner-friendly crochet projects.
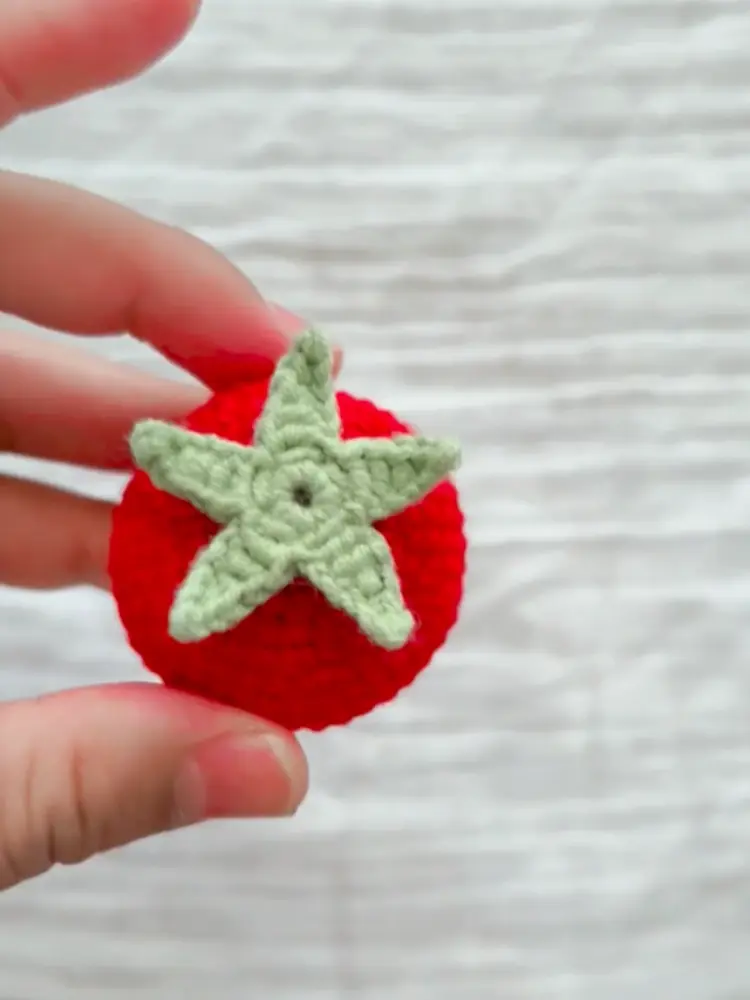
When I made this tomato, the funniest part was how plain it looked before the leaves went on. It was basically a red ball for a while. But once I added the green top, it suddenly looked like a tiny tomato, and that small transformation was very satisfying.
Below, I will share the written pattern in a beginner-friendly format, along with a video you can follow if you prefer seeing the steps instead of only reading stitch abbreviations.
Follow Along With the Tomato Crochet Video
Before jumping into the written pattern, I recommend watching the video first, especially if you are still getting used to reading crochet abbreviations. This little tomato is a simple project, but the shaping rounds, stuffing, and tiny leaf top can feel easier when you see the steps in motion.
In the video, you can follow the tomato from the first magic ring to the final green leaves. I also show where I start adding stuffing, how I keep the body rounded without overfilling it, and how I place the five small leaves on top.
After watching once, you can come back to the written pattern below and crochet at your own pace. I personally find this much less stressful than trying to understand every stitch from text alone.
Crochet Tomato Pattern
Materials
- Red lightweight cotton yarn for the tomato body
- Green lightweight cotton yarn for the leaf top
- 2.0 mm crochet hook
- Fiberfill stuffing
- Stitch marker
- Yarn needle
- Scissors
I made my little tomato with a thin cotton yarn made of four strands and a 2.0 mm crochet hook. It is the kind of yarn I like for tiny amigurumi because the stitches look neat and the finished piece keeps its shape well.
If your yarn is a little thicker or thinner, that is okay. Just use a hook that feels right for your yarn. For a small stuffed project like this, I would rather have the stitches slightly firm than too loose, so the fiberfill does not show through. If you are still unsure about hook sizes, my crochet hooks for beginners guide may help.
For tiny amigurumi like this, I usually prefer yarn that is not too fluffy, because it makes the stitches easier to see and the small shape cleaner. If you are still choosing your first yarns, you can read my best yarn for crochet beginners guide.
Abbreviations
This pattern uses US crochet terms.
- MR = magic ring
- ch = chain
- sl st = slip stitch
- sc = single crochet
- hdc = half double crochet
- dc = double crochet
- tr = treble crochet
- inc = increase, 2 sc in the same stitch
- dec = decrease, sc 2 stitches together
- st / sts = stitch / stitches
- R = round
Tomato Body
Use red yarn. Work in continuous rounds and use a stitch marker.
R1: 6 sc in MR. (6)
R2: inc in each st around. (12)
R3: (sc, inc) repeat 6 times. (18)
R4: (sc, inc, sc) repeat 6 times. (24)
R5: (3 sc, inc) repeat 6 times. (30)
R6: (2 sc, inc, 2 sc) repeat 6 times. (36)
R7: (5 sc, inc) repeat 6 times. (42)
R8–R11: sc in each st around. (42)
Start stuffing the tomato firmly but gently before the opening becomes too small.
R12: (5 sc, dec) repeat 6 times. (36)
R13: (2 sc, dec, 2 sc) repeat 6 times. (30)
R14: (3 sc, dec) repeat 6 times. (24)
R15: (sc, dec, sc) repeat 6 times. (18)
R16: (sc, dec) repeat 6 times. (12)
R17: dec around. (6)
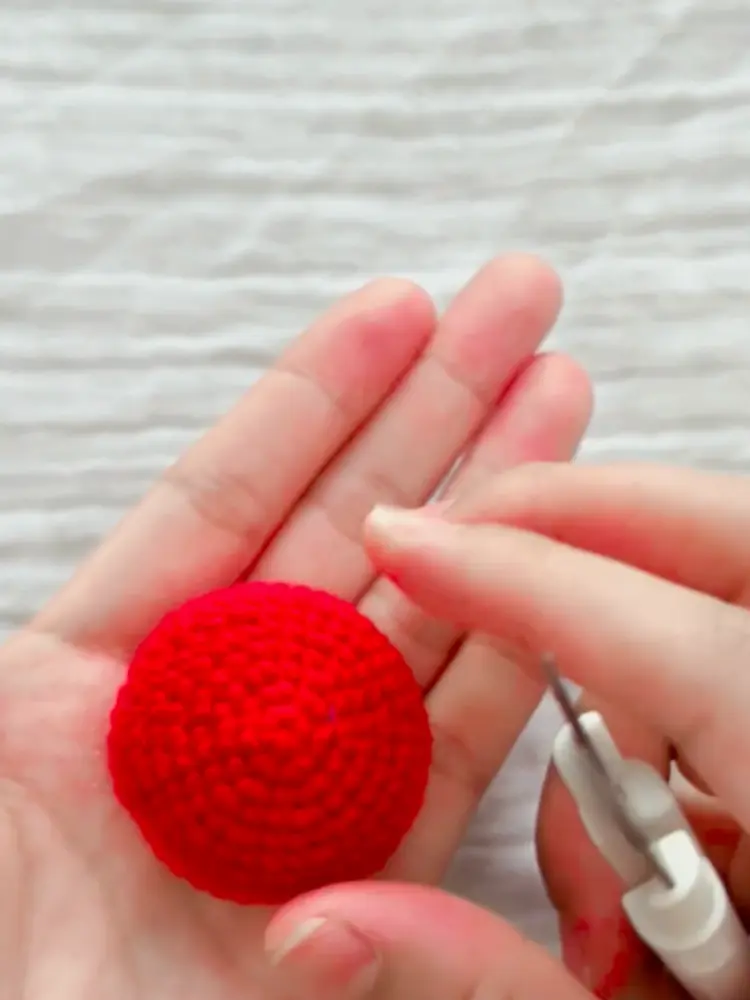
Before closing the tomato body, add more stuffing if needed. The tomato should feel full and gently rounded, but not so tightly stuffed that the stitches stretch open.
Fasten off, leaving a long tail. Weave the tail through the front loops of the remaining stitches, pull tight to close, and hide the yarn end inside.
Tomato Leaves
Use green yarn.
R1: 10 sc in MR. (10)
R2: Make 5 leaf points.
For each leaf point:
ch 6.
Starting from the 2nd ch from the hook, work back down the chain:
sl st, sc, hdc, 2 dc in the next ch, tr.
sl st into the next stitch of the center circle to attach the leaf
sl st once more into the next stitch of the center circle to move to the next position
Repeat until you have 5 leaves
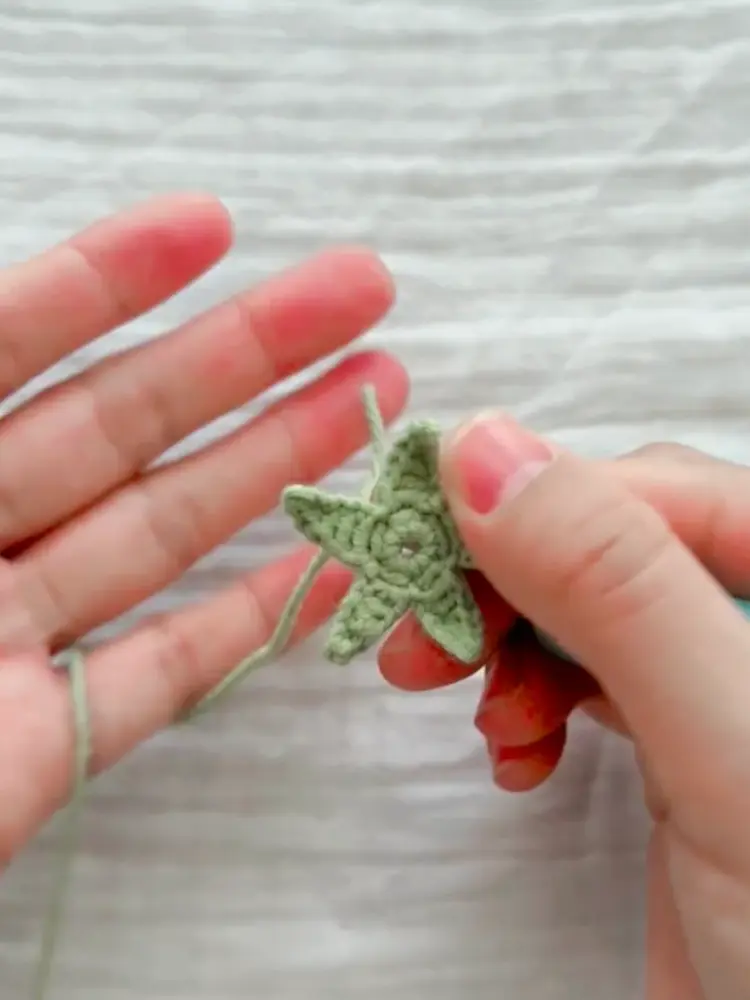
Fasten off, leaving a long tail for sewing. Sew the leaves to the top of the tomato.
The leaf round starts with a short chain. If chaining still feels uneven for you, you may want to review chain stitch for beginners before making the five leaf points.
A Slower Way to Read the Leaf Round
For each leaf point:
- ch 6
- Work back down the chain:
- sl st in the 2nd ch from hook
- sc in the next ch
- hdc in the next ch
- 2 dc in the next ch
- tr in the last ch
- sl st into the next stitch of the center circle to attach the leaf
- Repeat until you have 5 leaves
Little Things That Might Happen While Making Your Tomato
If Your Tomato Looks More Like a Ball at First
That is completely normal, especially before you add the leaves. The tomato shape comes mostly from the slightly flattened body and the green top. After stuffing, you can gently press the top and bottom with your hands to make it look less like a perfect round ball.
If you want a more tomato-like shape, do not overstuff it too tightly. A firm but slightly soft body is easier to shape.
When Your Stitch Count Does Not Match the Pattern
If you are only off by one stitch, you may not need to undo the whole round. You can usually fix it in the next round by adding one extra decrease or skipping one decrease, depending on your count.
But if the mistake happened in the increasing rounds, especially before R7, I usually prefer to undo that round and fix it. The shape of small amigurumi pieces depends a lot on the increase pattern.
Using a stitch marker at the beginning of every round helps a lot.
If You See Small Gaps Near the Decrease Rounds
Gaps often happen when the decreases are worked too loosely, or when the stuffing is pushing through the stitches.
For a cleaner finish, try using an invisible decrease instead of a regular decrease. Also, avoid overstuffing near the final rounds. You can add stuffing gradually, then gently shape the tomato before closing.
The Best Time to Add Stuffing
I like to start stuffing after R11 or around R12, before the opening becomes too small. Add the stuffing little by little instead of pushing in one big piece.
After R15 or R16, check the shape again and add a little more stuffing if needed. The tomato should feel full, but not so tight that the stitches stretch open.
How I Space the Five Tomato Leaves
The leaf center starts with 10 sc, and you will make 5 leaf points around it. That means each leaf point roughly uses 2 stitches from the center circle.
After making one leaf point, slip stitch into the next stitch to attach it. Then slip stitch once more into the next stitch to move to the next position. This helps space the 5 leaves more evenly around the center.
Do not worry if the spacing is not perfect. Once the leaves are sewn onto the tomato, small uneven spots are not very noticeable.
If Your Leaves Curl a Little
A little curling is very normal. Small crochet leaves often curl slightly, especially when the stitches go from short to tall stitches in one chain.
You can gently shape the leaves with your fingers after finishing. If they curl too much, try loosening your chain stitches next time, or use a slightly larger hook for the leaf part.
For a cute tomato, a little curling actually makes the leaves look more natural.
Sewing the Leaf Top Without Making It Look Messy
Place the leaf piece on the top center of the tomato first and check the position before sewing. I like to pin it in place or hold it with my fingers while sewing around the center circle.
Use the long green yarn tail to sew through the base of the leaves and into the tomato body. Try not to pull too tightly, or the top of the tomato may sink in too much.
A slight dip in the center is okay — it can make the tomato look more realistic.
Making the Tomato Bigger or Smaller
The easiest way to change the tomato size is to use a different yarn and hook size.
For a smaller tomato, use thinner yarn and a smaller hook. For a larger tomato, use thicker yarn and a larger hook.
I would not recommend changing the stitch counts if you are a beginner, because the increase and decrease rounds are what keep the tomato shape balanced.
What to Try Next
If this little tomato made you want to keep going, I would stay with small beginner-friendly crochet projects for now. They are quick enough to finish, but still give you plenty of practice with shaping, stuffing, and sewing small details.
- Mini Crochet Strawberry Keychain — another tiny red fruit project that feels very close to this tomato.
- Crochet Mini Apple — a simple fruit-inspired amigurumi piece for practicing round shapes.
- Crochet Mushroom Pattern — a cute next project if you want more practice with small 3D shapes.
- Single Crochet Magic Ring — helpful if starting the tomato body felt confusing.
- Single Crochet for Beginners — a useful refresher because most of this tomato is built with single crochet.