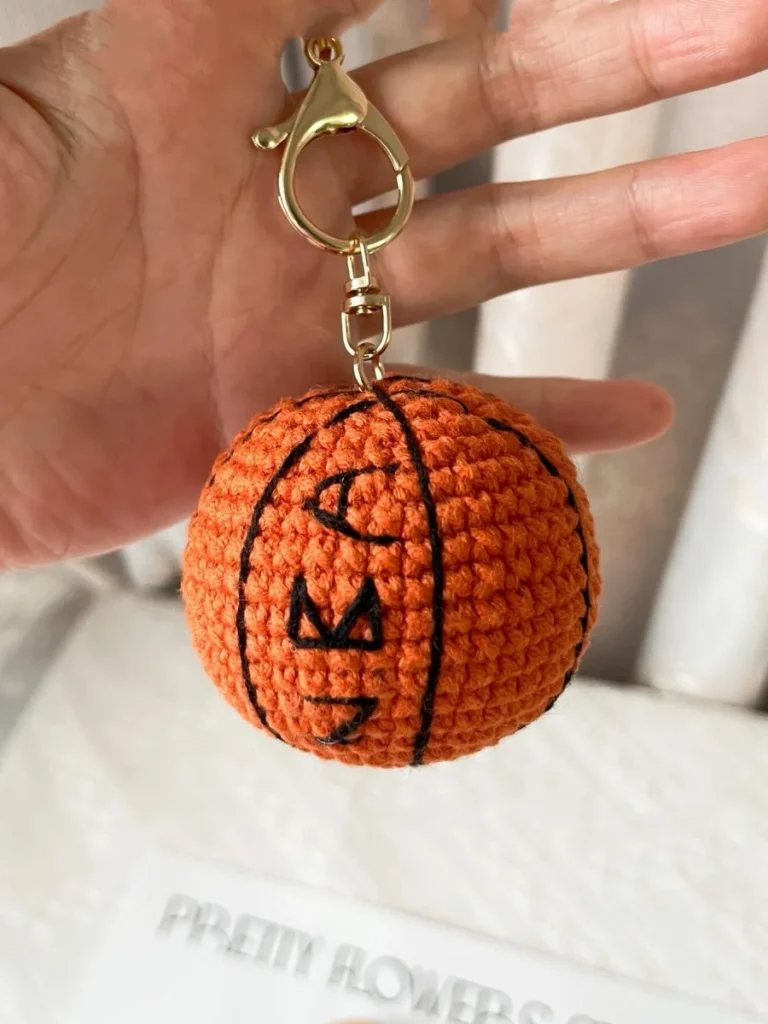
I like small crochet projects for beginners that have a funny little “almost there” stage. This mini basketball definitely has one. When the orange ball is finished, it does not look very exciting yet. It is round, soft, and cute, but it still feels more like a plain orange amigurumi ball than a basketball.
The real change happens when the black lines go on. Once those lines wrap around the ball, the whole piece suddenly makes sense. That is the part I enjoyed most, because it feels like adding the personality at the very end.
The crochet part is beginner-friendly: mostly single crochet, simple increases, decreases, stuffing, and closing. The only step I would slow down for is the embroidery, because the line placement matters more than I expected.
In this pattern, I will walk through the orange ball first, then show how I add the black basketball lines so it looks like a tiny finished basketball instead of just a little round ball.
What I Used for This Mini Basketball
For this little basketball, I kept the materials very simple. The main thing I cared about was getting a neat round shape and having black lines that were easy to control on the surface.
- Orange yarn for the basketball body
- Black yarn or black embroidery thread for the basketball lines
- A crochet hook that matches your yarn
- Fiberfill stuffing
- Stitch marker
- Yarn needle
- Scissors
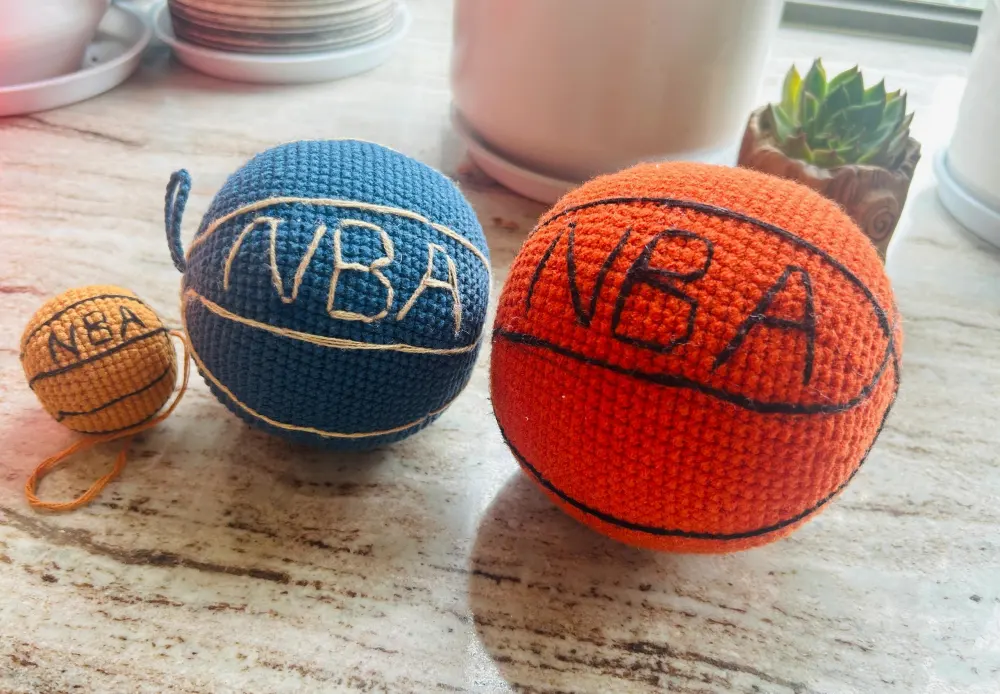
I would choose a yarn that gives you firm stitches for the ball, because this project needs to hold a round shape after stuffing. If the stitches are too loose, the fiberfill may show through, and the embroidered lines may pull the ball out of shape more easily. If you are still figuring out hook sizes, my crochet hooks for beginners guide may help.
For the black basketball lines, I prefer using something a little thinner than the orange yarn. Thin black yarn or embroidery thread is easier to guide around the ball, and it makes the lines look cleaner without adding too much bulk.
If this is your first time embroidering on crochet, I would avoid thick black yarn. It can cover too much of the orange ball and make the lines harder to curve smoothly. For tiny amigurumi like this, I usually prefer yarn that shows the stitches clearly and does not feel too fuzzy. If you are still choosing your first yarns, you can read my best yarn for crochet beginners guide.
Before You Start: The Lines Matter More Than I Expected
The crochet part of this mini basketball is really just a basic orange ball. The shape matters, of course, but the black lines are what make it instantly read as a basketball.
When I first finished the ball, it looked cute, but also a little plain. Once I started adding the black lines, the whole piece changed very quickly.
This is why I would not rush the embroidery step. Try to place the lines gently on the surface instead of pulling them deep into the stitches. The lines should guide the shape of the basketball, not squeeze the stuffing or flatten the ball.
Abbreviations
This pattern uses US crochet terms. The basketball body is worked in continuous rounds, so I recommend using a stitch marker to mark the first stitch of each round.
- MR = magic ring
- sc = single crochet
- inc = increase, 2 single crochet in the same stitch
- dec = decrease, single crochet 2 stitches together
- st / sts = stitch / stitches
- R = round
If you are reading from Chinese crochet notes, x means single crochet, v means increase, and a means decrease in this pattern.
Mini Crochet Basketball Pattern
Use orange yarn for the basketball body. This part is worked in continuous rounds, so do not join at the end of each round. I like to place a stitch marker in the first stitch of every round so I do not lose track, especially once the ball starts curving. Since the whole ball is built with single crochet, you can review my single crochet for beginners guide if you want a slower stitch refresher before starting.
Basketball Body
R1: 6 sc in MR. (6)
R2: inc in each st around. (12)
R3: (sc, inc) repeat 6 times. (18)
R4: (2 sc, inc) repeat 6 times. (24)
R5: (3 sc, inc) repeat 6 times. (30)
R6: (4 sc, inc) repeat 6 times. (36)
R7: (5 sc, inc) repeat 6 times. (42)
R8: (6 sc, inc) repeat 6 times. (48)
At this point, the piece will start looking like a shallow orange bowl. That is normal. The middle rounds will give it more height before we begin decreasing. If the magic ring still feels tricky, you may want to review my single crochet magic ring guide before starting the basketball body.
R9–R16: sc in each st around for 8 rounds. (48)
Keep moving your stitch marker up at the beginning of each round so you do not accidentally crochet too many or too few middle rounds.
These straight rounds create the middle of the ball. I try to keep my tension even here, because this is the part where the basketball lines will sit later.
R17: (6 sc, dec) repeat 6 times. (42)
R18: (5 sc, dec) repeat 6 times. (36)
R19: (4 sc, dec) repeat 6 times. (30)
R20: (3 sc, dec) repeat 6 times. (24)
Start adding stuffing after R20, while the opening is still large enough to adjust the shape. Add the fiberfill little by little instead of pushing in one big piece. I like the ball to feel full, but not so tight that the stitches stretch open.
R21: (2 sc, dec) repeat 6 times. (18)
R22: (sc, dec) repeat 6 times. (12)
R23: dec repeat 6 times. (6)
Add a little more stuffing before closing if the ball still feels soft or uneven. Fasten off, leaving a yarn tail. Weave the tail through the front loops of the remaining stitches, pull tight to close, and hide the yarn end inside the ball.
Before adding the black lines, roll the ball gently between your hands to even out the shape. It does not need to be perfectly round, but a smooth surface makes the embroidery easier.
The Part I Would Watch Once: Sewing the Black Lines
The orange ball itself is very simple. The part that made me slow down was the black basketball lines, because a small shift can change the whole look of the finished piece.
In the video, I show how I sew the black yarn around the ball, how I space the lines, and how I keep the embroidery from pulling the ball out of shape. This step is much easier to understand when you can see the yarn moving across the surface.
You can crochet the ball first, then come back to this video before adding the lines.
Adding the Basketball Lines
This is the step where the orange ball finally starts looking like a basketball. I like to take my time here, because the lines do not have to be perfect, but they do need to feel balanced around the ball.
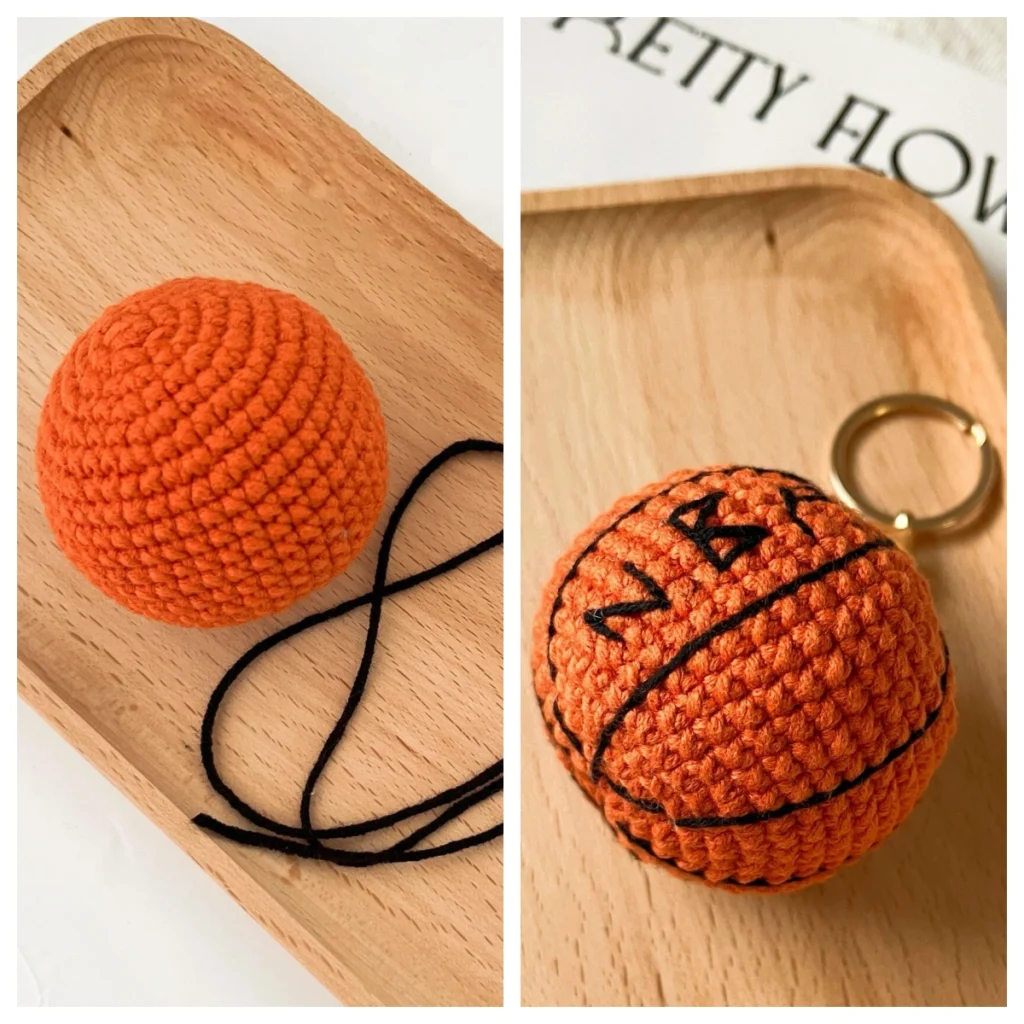
Use black yarn or black embroidery thread and a yarn needle. If your black yarn is very thick, the lines may look bulky, so I prefer something a little thinner than the yarn I used for the ball.
Start with One Long Line Around the Ball
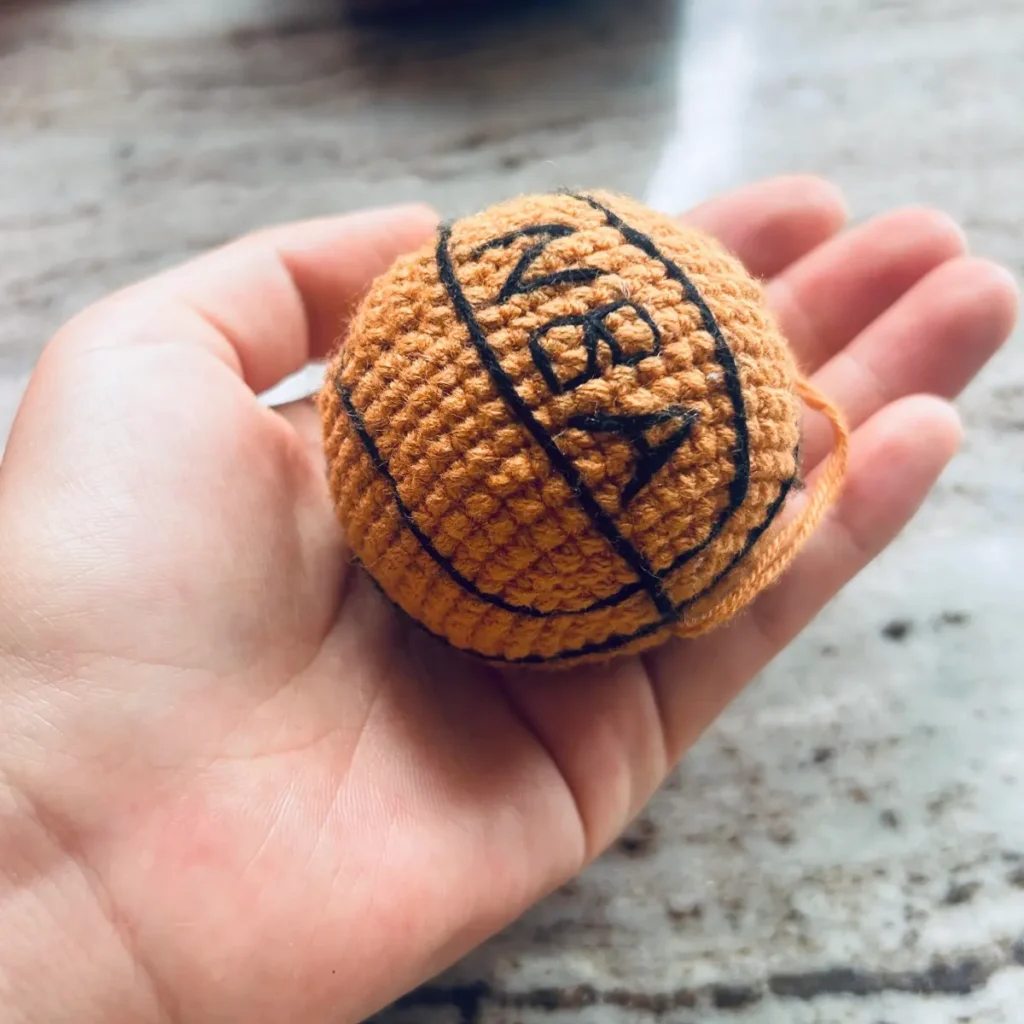
First, make one long line that goes all the way around the ball from top to bottom and back to the starting point. I think of this as the main dividing line of the basketball.
Insert the needle near the top closing point, guide the black yarn down along the surface of the ball, then bring it around to the opposite side and back up again. Try to keep the line as centered as you can, but do not worry if it has a handmade curve.
Once this first line is in place, the rest of the lines are much easier to judge. I usually check the ball from the front and side before securing the yarn end. Before sewing, I like to imagine the line first, or gently hold the black yarn against the ball to preview where it will go. This helps me avoid starting too far to one side.
Add Three Curved Lines Around the Ball
Next, add three curved lines around the ball. These are the lines that help create the classic basketball sections.
I like to place one line around the middle first, then add the other two curved lines on each side. Try to space them evenly, but remember that this is a tiny crochet ball, so the lines will not look exactly like a printed basketball.
As you sew, let the black yarn follow the surface of the ball instead of forcing it into a perfectly straight path. A soft curve usually looks more natural on a round crochet piece.
Do Not Pull the Lines Too Tight
This is the part I pay the most attention to. If the black yarn is pulled too tightly, it can sink into the stitches and make the ball look dented.
I pull the yarn just enough for the line to sit neatly on the surface. The ball should still feel round and soft after the embroidery is finished.
If one line looks a little off, I would rather adjust it gently than keep tightening it. The goal is not a perfectly printed basketball. The goal is a tiny handmade basketball that still keeps its round shape.
Little Things That Might Happen While Making It
If Your Basketball Looks Like a Plain Ball at First
That is completely normal. Before the black lines are added, this project is really just a small orange ball. I actually like that stage because it reminds me how much one finishing detail can change the whole piece.
Do not judge it too early. Once the black lines go on, the basketball look appears very quickly.
If the Ball Looks Lumpy After Stuffing
A little unevenness can happen, especially with small amigurumi balls. I try not to push one big piece of stuffing into the ball all at once. Smaller pieces are easier to spread around, and they help the shape stay smoother.
Before closing the final rounds, roll the ball gently between your hands and press any lumpy spots into shape. It does not need to be perfectly round, but a smoother surface will make the black lines easier to place later.
If the Closing Hole Looks Loose
The closing hole can look a little loose if the last decrease round is not pulled tight enough. After fastening off, weave the yarn tail through the front loops of the remaining stitches and pull slowly until the opening closes.
If the hole still looks open, I like to make one or two extra small stitches across the closing point before hiding the yarn end inside the ball. The black embroidery can also help distract from tiny imperfections later.
If the Black Lines Look Uneven
This is the part where I would slow down instead of trying to finish quickly. On a tiny crochet ball, even a small shift can make the line look more curved than expected.
Before securing the black yarn, look at the ball from a few angles. If the line feels too far to one side, gently move it before pulling the yarn end in. I would rather adjust the line early than keep tightening it and hope it looks better.
If the Embroidery Pulls the Ball Out of Shape
This usually means the black yarn is being pulled too tightly. The line should sit on the surface of the crochet stitches, not sink deeply into the ball.
If the ball starts to dent, loosen the embroidery slightly and reshape the ball with your fingers. For this project, a softer line usually looks better than a line that is perfectly tight but makes the basketball lose its round shape.
What I Would Try Next
If this mini basketball was fun to make, I would stay with small sporty crochet projects for a little while. They are playful, quick to finish, and they give you a nice way to practice shape, details, and simple finishing without starting a large amigurumi project.
For another ball-shaped project, you might like my crochet volleyball keychain. It is a nice next step if you enjoyed making a round shape and adding surface details.
If you want something still sporty but flatter and easier to finish, the crochet ping pong paddle keychain is a fun little project. I also like the mini crochet shuttlecock keychain if you want to try a small sports-themed piece with a different shape.
And if the first few rounds of the basketball felt tricky, you may want to review the single crochet magic ring guide before your next amigurumi project. Since the whole basketball body is built with single crochet, my single crochet for beginners guide can also be helpful if you want a slower stitch refresher.