
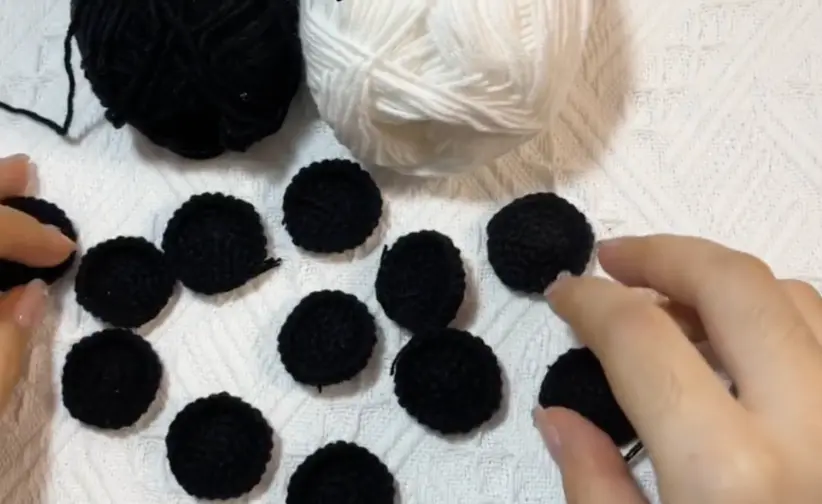
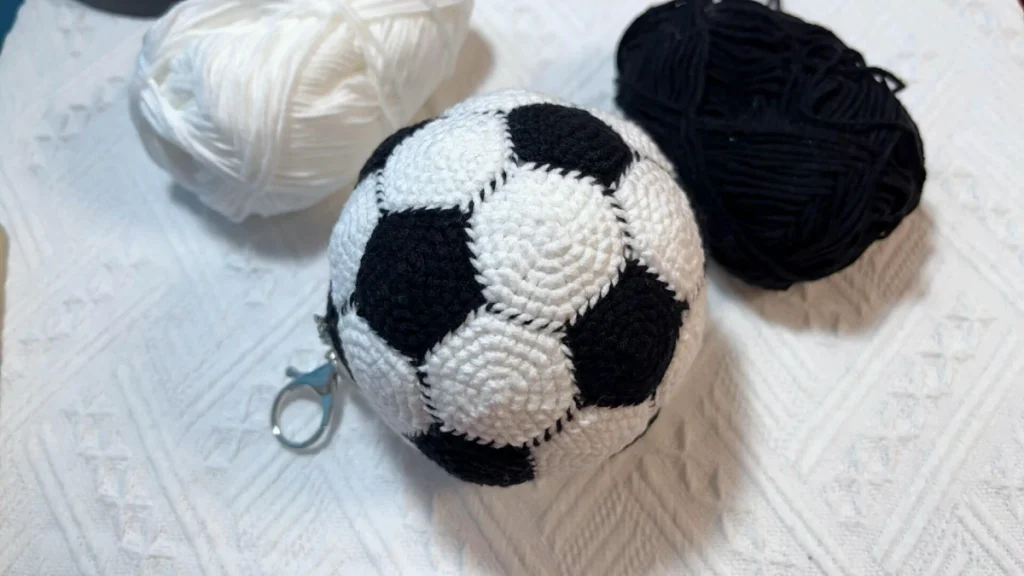
This mini crochet soccer ball is a little different from the small beginner-friendly crochet projects I usually make. Instead of crocheting one round ball and adding details later, this one is built from many small pieces: black pentagons and white hexagons.
At first, the pieces may not look very exciting on their own. They are just small flat circles with slightly different shapes. But once the black and white pieces start coming together, the soccer ball pattern slowly appears, and that part feels really satisfying.
The stitches themselves are beginner-friendly. Most of the work is single crochet, increases, and simple sewing. The part I would slow down for is the assembly, because the layout matters much more than the individual crochet pieces.
In this pattern, I will walk through the black pentagons, the white hexagons, and then the way I sew them into two half-balls before joining and stuffing the whole soccer ball.
The Part I Would Watch Before Sewing Anything
If you only read the written assembly steps, this project can feel a little abstract. The pieces are small and simple, but it is hard to imagine how they turn into a ball until you see the first few pieces being placed together.
In the video, I focus on the part I think beginners need most: where the first black piece goes, how the white pieces sit around it, and how the flat layout slowly starts curving into a half-ball.
I would watch this once before sewing. After that, the written steps below feel much less like a puzzle.
The Simple Materials I Used
- Black yarn for the pentagon pieces
- White yarn for the hexagon pieces
- A crochet hook that matches your yarn
- Fiberfill stuffing
- Stitch marker, optional but helpful
- Yarn needle
- Scissors
I would choose yarns that are close in thickness for this project. If the black yarn and white yarn are very different, the pieces may not line up as neatly when you sew them together.
For a small soccer ball, I also prefer stitches that feel fairly firm. The ball will be stuffed at the end, so loose stitches may stretch open or make the seams look less clean.
If you are still figuring out hook sizes, my crochet hooks for beginners guide may help you choose a hook that gives you firm enough stitches. For this project, I would avoid very fuzzy yarn at first, because clear stitches and clean edges make the sewing much easier. If you are still choosing beginner yarns, you can read my best yarn for crochet beginners guide.
The Layout Is the Real Pattern Here
The crochet part is simple, but the assembly can feel confusing if you sew the pieces randomly. A soccer ball needs the black and white pieces to be placed in a repeating pattern.
The easiest way for me is to make two half-balls first. Each half starts with one black pentagon in the center, then white hexagons around it, then more black and white pieces around the outside.
If you are new to this kind of project, I recommend laying the pieces on the table before sewing. It is much easier to check the pattern when everything is flat in front of you.
The Pieces I Make Before Sewing
- 12 black pentagons
- 20 white hexagons
The black pieces have 5 repeat sections, so they become pentagons. The white pieces have 6 repeat sections, so they become hexagons.
Do not worry if the pieces still look a little round after crocheting. Once they are sewn together edge to edge, the pentagon and hexagon shapes become much clearer.
Seeing 32 pieces written out can feel like a lot, but I do not think of them as 32 separate decisions. I treat them as two small batches: the black centers and the white pieces that build around them.
Abbreviations
This pattern uses US crochet terms.
- MR = magic ring
- sc = single crochet
- inc = increase, 2 single crochet in the same stitch
- st / sts = stitch / stitches
- R = round
If you are reading from Chinese crochet notes, x means single crochet and v means increase in this pattern.
Since all the small pieces are made with single crochet and increases, you can review my single crochet for beginners guide if you want to slow down the basic stitch before starting.
Black Pentagon Pieces
Make 12 black pentagons.
Use black yarn. Work in rounds.
R1: 5 sc in MR. (5)
R2: inc in each st around. (10)
R3: (sc, inc) repeat 5 times. (15)
R4: (2 sc, inc) repeat 5 times. (20)
R5: (3 sc, inc) repeat 5 times. (25)
Fasten off. Leave a long tail if you want to use it for sewing later.
The 5 increase points help this piece behave like a pentagon. I like to flatten each piece gently with my fingers before sewing so the edges are easier to match.
White Hexagon Pieces
Make 20 white hexagons.
Use white yarn. Work in rounds.
R1: 6 sc in MR. (6)
R2: inc in each st around. (12)
R3: (sc, inc) repeat 6 times. (18)
R4: (2 sc, inc) repeat 6 times. (24)
R5: (3 sc, inc) repeat 6 times. (30)
Fasten off. Leave a long tail if you want to use it for sewing later.
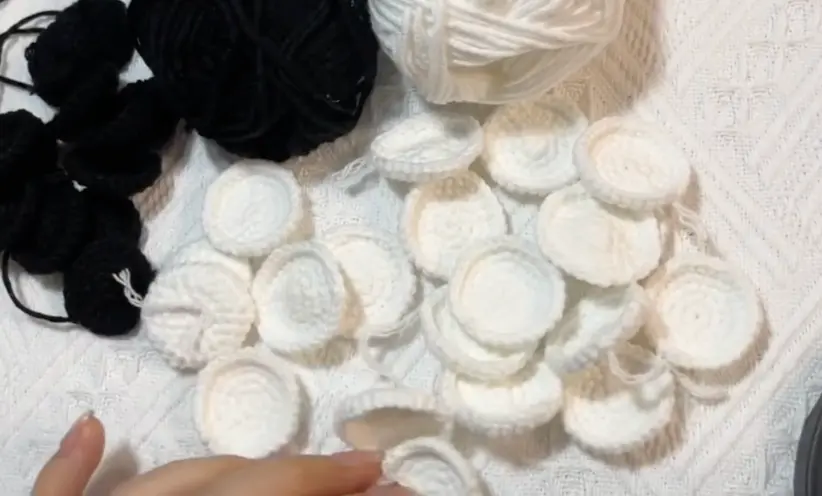
The white hexagons are a little wider than the black pentagons because they have 6 sides instead of 5. This difference is what helps create the classic soccer ball pattern.
How I Put the Soccer Ball Together
This is the part where I slow down the most. The pieces are simple, but the ball only starts to make sense when the black and white pieces are placed in the right order.
You will make the ball in two halves first, then sew the two halves together. Each half uses 16 pieces:
- 1 black pentagon in the center
- 5 white hexagons around that black pentagon
- 5 black pentagons between the white pieces
- 5 more white hexagons around the outside edge
When both halves are finished, you will have used all 12 black pentagons and all 20 white hexagons.
I Start with One Black Center Piece
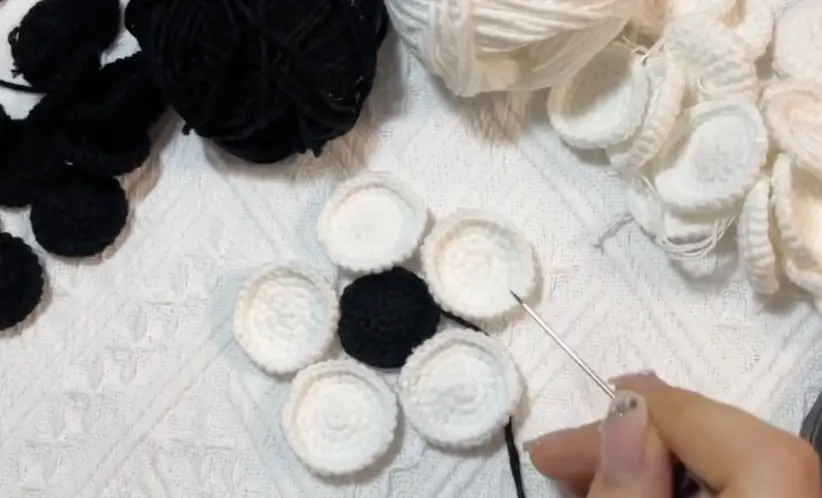
Place one black pentagon in the center. This will be the middle of one half of the soccer ball.
Then place 5 white hexagons around it. Each side of the black pentagon should touch one white piece. I like to check this layout before sewing anything too firmly.
Sew the 5 white pieces around the black piece. I like to sew through the outer loops along the edges, because it keeps the seam neater and makes the black-and-white pattern easier to see.
Add Black Pieces Between the White Pieces
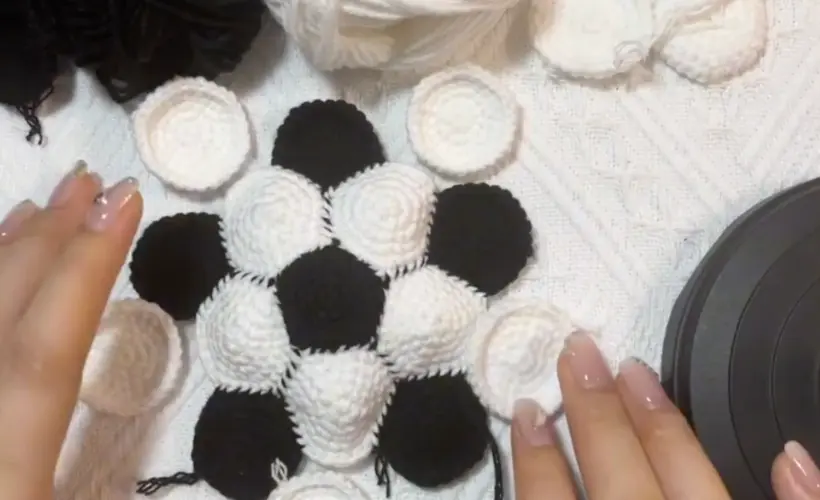
After the first 5 white hexagons are attached, place one black pentagon between each pair of white pieces.
This part is important: black pieces should not sit directly next to each other. Each black pentagon should be surrounded by white pieces, just like a real soccer ball pattern.
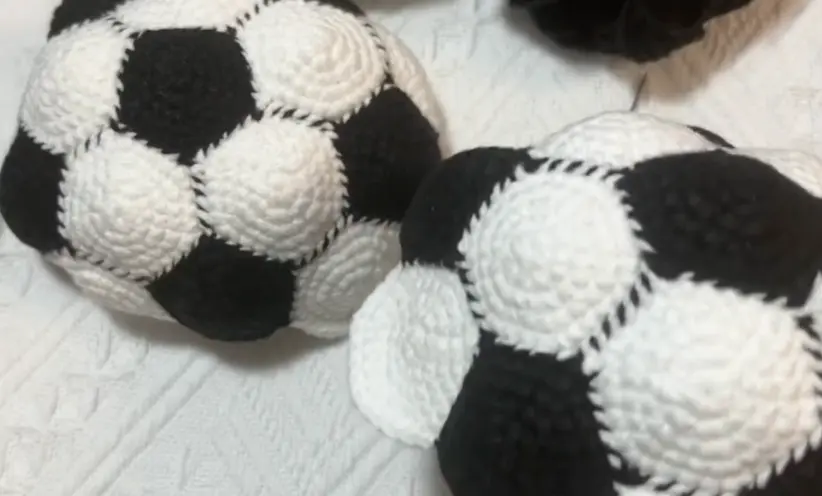
At this stage, the piece will start to curve a little. That is a good sign. It means the flat pieces are beginning to form a half-ball shape.
Add the Outer White Pieces
Next, add 5 more white hexagons around the outside edge. These white pieces help finish the first half of the ball.
By now, one half should look like a shallow bowl. It will not be perfectly round yet, but it should already look like part of a soccer ball.
Do not pull the seams too tightly while sewing. If the seams are too tight, the half-ball may become stiff or uneven before you add stuffing.
Make the Second Half the Same Way
Make the second half using the same steps: one black pentagon in the center, 5 white hexagons around it, 5 black pentagons between the white pieces, and 5 more white hexagons around the outer edge.
Before sewing the two halves together, I like to place them side by side and check the pattern. If the black pieces look evenly spaced, the finished soccer ball will look much cleaner.
Join the Two Halves and Add Stuffing
Place the two halves together and sew around the edge. Try to keep the black-and-white pattern continuing around the ball instead of letting the pieces twist out of place.
Do not close the whole ball at once. Leave a small opening for stuffing.
Add fiberfill little by little. I like to shape the ball with my hands as I stuff it, because the seams and pieces need a little help becoming round.
Once the ball feels full but not too tight, sew the small opening closed and hide the yarn end inside.
Small Things That Saved Me From a Messy Soccer Ball
Do Not Sew All the Pieces Randomly
This is not a project where I would sew pieces together randomly and hope the pattern works out. The black pentagons need to be spaced between white hexagons, or the soccer ball pattern will look confusing.
Make Two Halves First
Making two halves first feels much easier than trying to build the whole ball in one piece. Each half is easier to hold, check, and adjust before stuffing.
Leave a Small Opening for Stuffing
Do not close the ball completely before adding stuffing. Leave a small opening, add the fiberfill slowly, then finish sewing after the ball has enough shape.
If the Ball Looks Uneven
A handmade soccer ball may look a little uneven before stuffing. After the fiberfill goes in, gently press and roll the ball with your hands. The shape usually becomes much better once it is filled.
If the Seams Look Too Tight
If the seams pull too tightly, the pieces may bunch up or lose their shape. Try to sew firmly enough to hold the pieces together, but not so tightly that the edges pucker.
What I Would Try Next
For another ball-shaped project, you might like my mini crochet basketball pattern. It is much simpler to build because the ball is crocheted as one piece, and the lines are added afterward.
You can also try my crochet volleyball keychain if you want another sports-themed project with surface details.
If you want a sporty project with less assembly, the crochet ping pong paddle keychain or the mini crochet shuttlecock keychain would feel much lighter after this soccer ball.
And if the small starting rounds felt tricky, I would review my single crochet magic ring guide before making more amigurumi pieces.